Search the Community
Showing results for tags 'gmax'.
Found 20 results
-
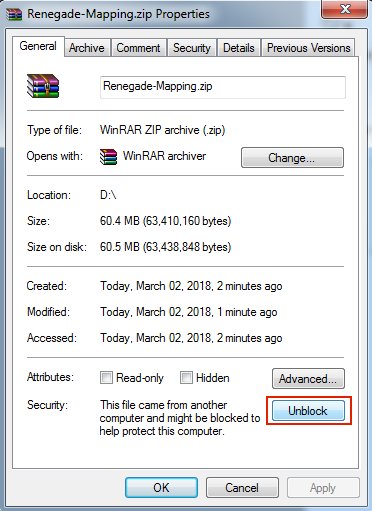
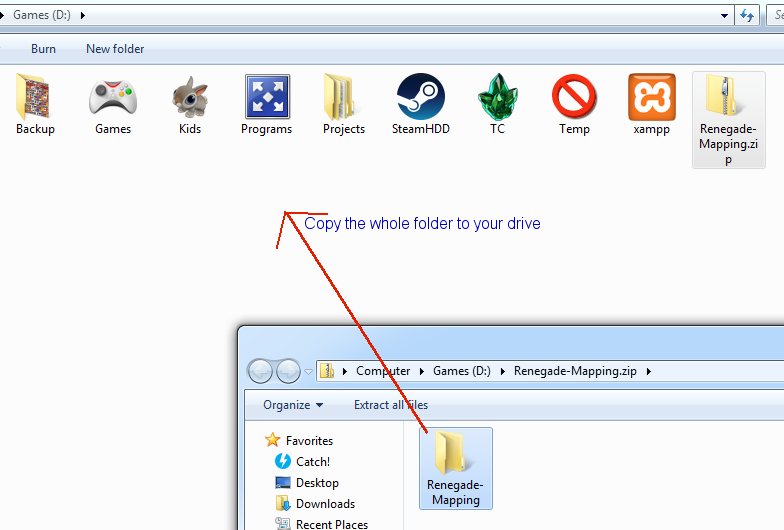
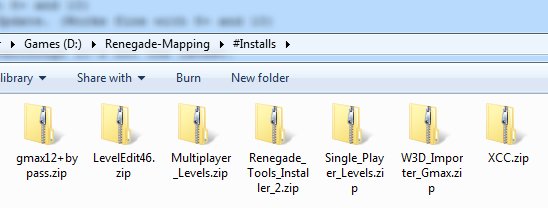
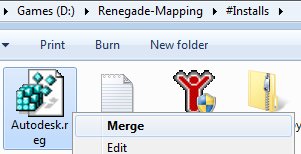
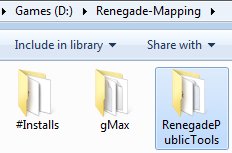
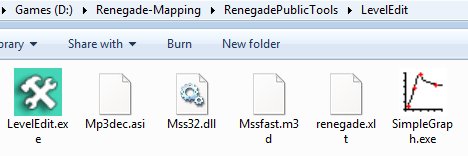
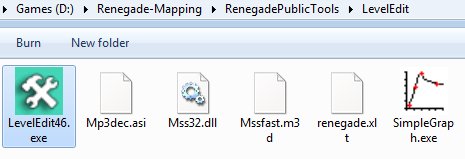
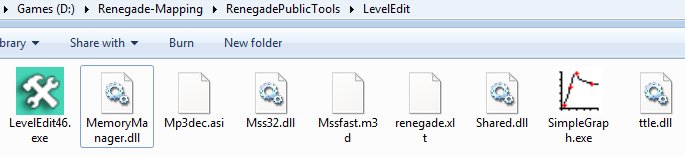
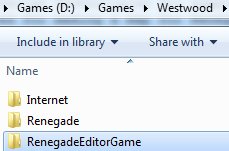
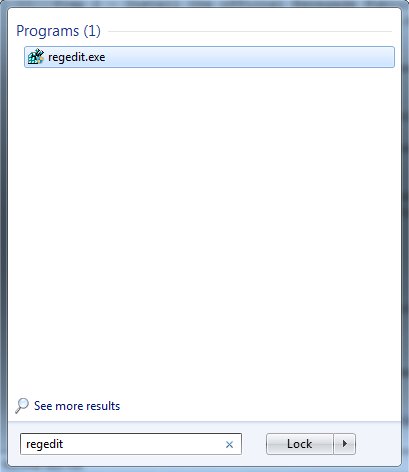
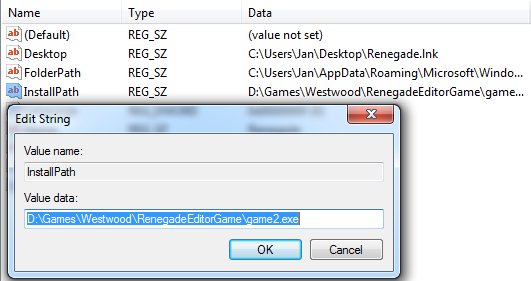
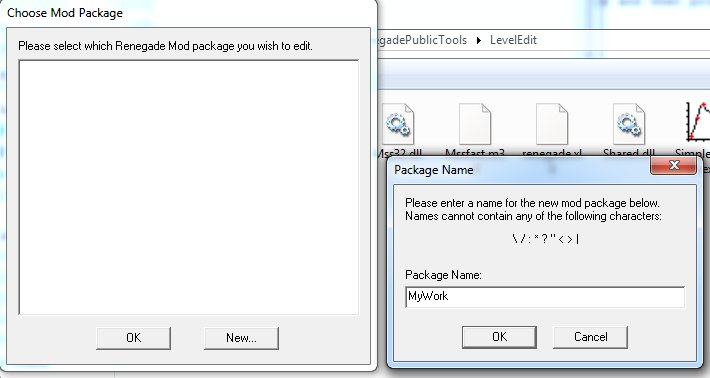
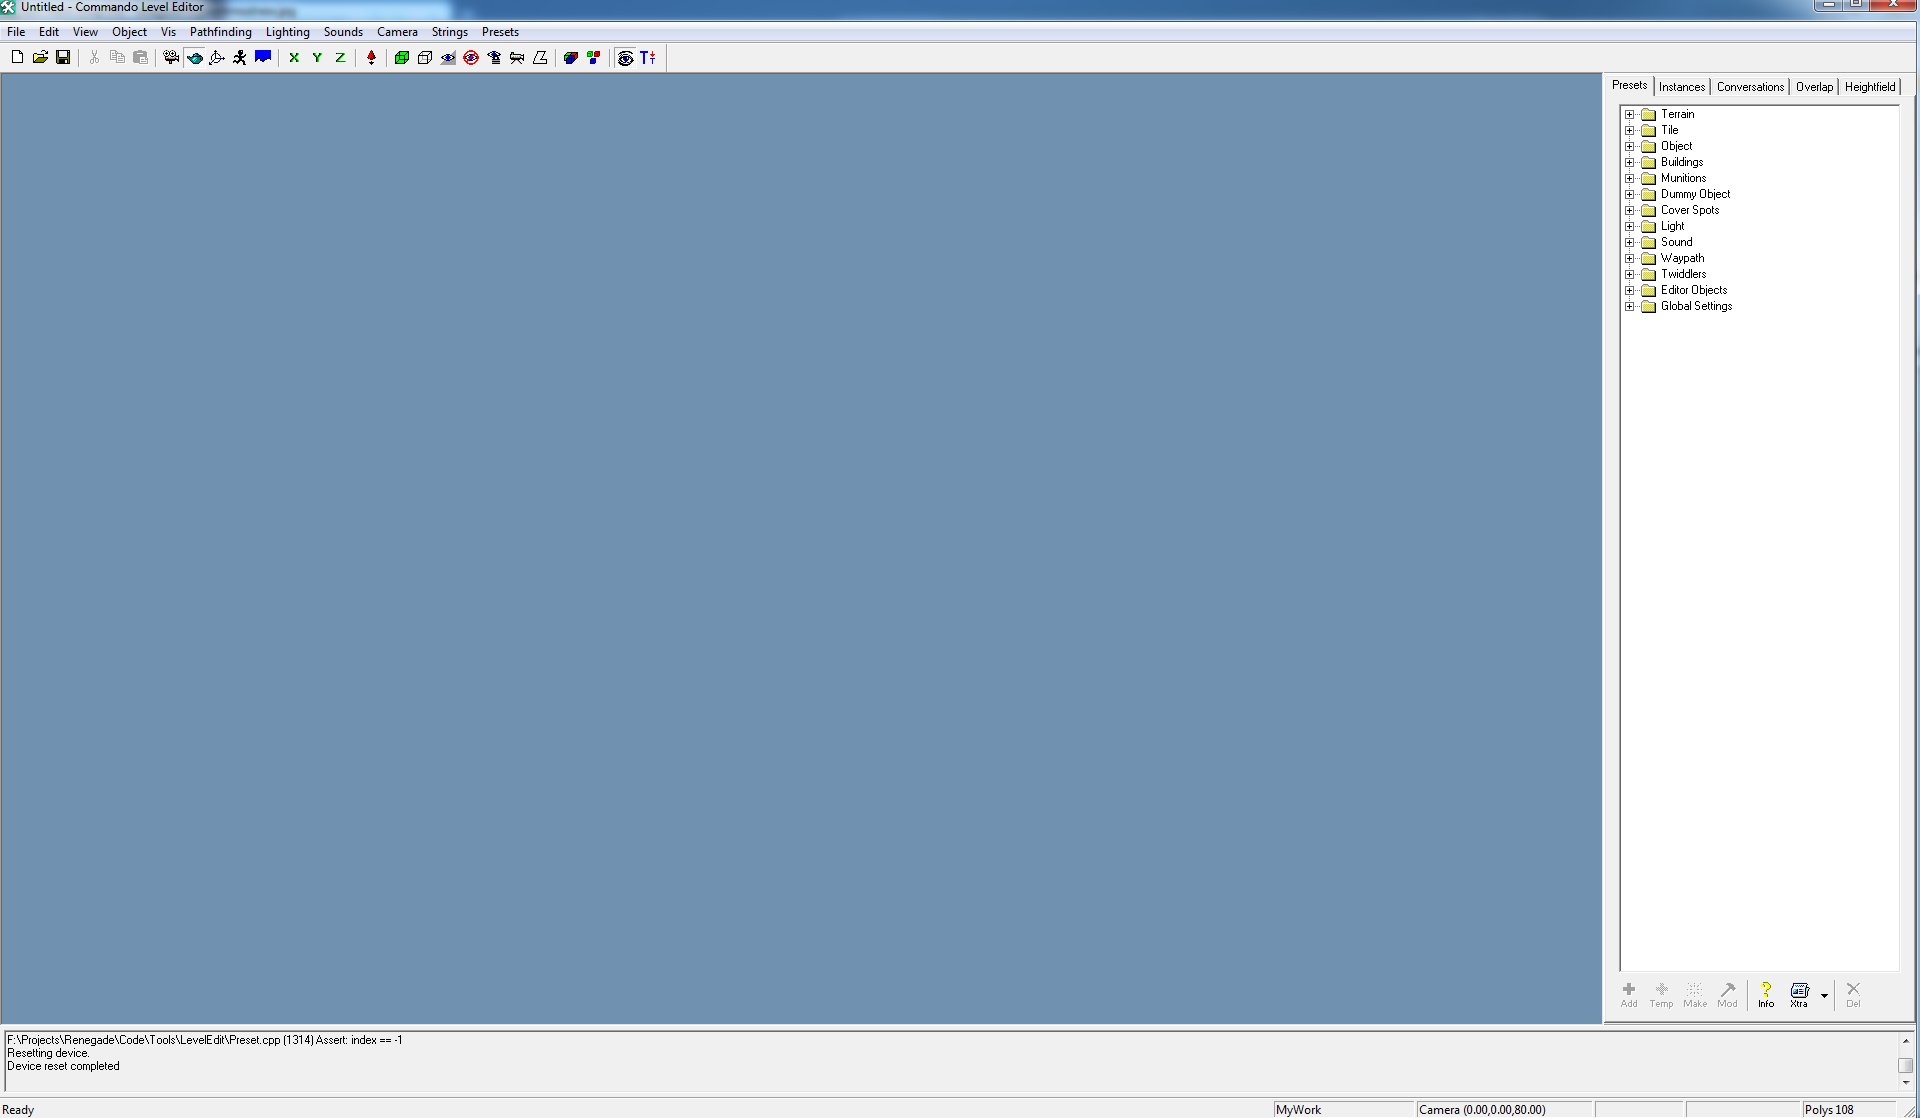
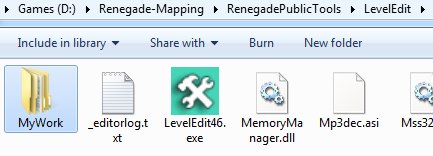
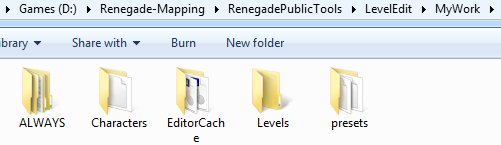
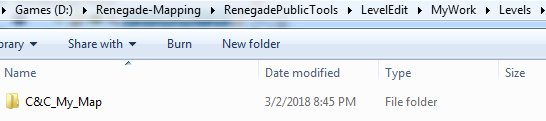
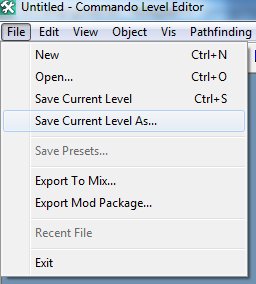
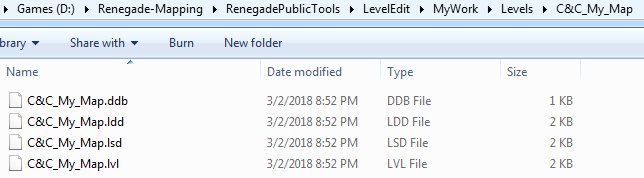
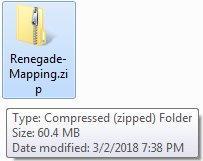
 The Environment Setup Tutorial This tutorial will attempt to learn you how to setup your entire working environment for creating maps in gMax and the free provided Renegade Public Tools v2. It includes all the tools you need and they should be installed in this particular order: 1- The gMax Installation Files and Registration ByPass. (NOTE: Windows 8+ and 10 are NOT supported, you'll need Windows 7 or XP Pro to use gMax without glitches, there is NO fix for this.) 2- The official Renegade Public Tools version 2 from Westwood Studios. (Works fine with 8+ and 10) 3- The unofficial LevelEditor from Tiberian Technologies for support with 4.6 Scripts Update. (Works fine with 8+ and 10) 4- Some (semi) Critical Assets required for making a map for Renegade in gMax/RenX. 5- The XCC mixer i personally have been using since i don't know when, it's the best eventhough it's not the latest. Environment Guide Package Download the file i prepared as zip from the MPF download area: Once it is downloaded, make sure you unblock the file by going to the zip properties and clicking "Unblock" BEFORE you extract it. In this tutorial i will install EVERYTHING to do with mapping for Renegade in my folder on the D drive in "Renegade-Mapping". Go ahead and extract the zip somewhere, open it in a new window: And then copy the contents somewhere: Go into the #Installs folder that you extracted inside the Renegade-Mapping folder Step 1 - Install gMax and apply the registry fix We need to install gMax first, you MUST install it first or it won't work properly later. Open the gmax12+bypass.zip and copy files into your #Installs folder and then run gmax12.exe to install it. In this guide i am installing directly into the Renegade-Mapping folder so the endresult will be something like the following: Now, because the author of gMax doesn't send out emails anymore to register gMax for free, there is included a Autodesk.reg file, right click on that and choose Merge and when promted do Yes to merge it. When installation is done and you merged the registry thing, then run gMax for the first time. You will be prompted to select a rendering device, here you choose "Direct 3D" and continue. Once it has fully loaded you must exit gMax again. Step 2 - Install the official Renegade Public Tools v2 Extract the file Renegade_Tools_Installer_2.zip and run the executable, install it into your Renegade-Mapping folder, endresult should look simular to this: Go into the folder LevelEdit and you will see these files: Now delete (yes delete permanently) the LevelEdit.exe that is currently there, the original from Westwood. Extract the file LevelEdit46.zip and copy the resulting LevelEdit46.exe to your LevelEdit folder like so: Goto your Renegade GAME folder, which you updated to the latest TT Script Update (available on http://www.tiberiantechnologies.org ) Copy the following files to your LevelEdit folder and overwrite any existing ones there: "MemoryManager.dll" "Mss32.dll" "Shared.dll" "ttle.dll" You should end up with a LevelEdit folder looking like this: Now make a complete copy of your Renegade game folder (which is updated to 4.6 of course) and name it "RenegadeEditorGame", just copy and paste it somewhere like: Now open the Registry Editor through your startmenu "search" option type: regedit and open it. Expand the folders (or keys as they are called) until you are inside the Renegade folder/key. "HKEY_LOCAL_MACHINE -> SOFTWARE -> Wow6432Node -> Westwood -> Renegade" You see the InstallPath option there? Double click on it and change its value to where your game2.exe is located in the RenegadeEditorGame you copied earlier, in my example here it would be: D:\Games\Westwood\RenegadeEditorGame\game2.exe Now close the Registry Editor program, we don't need it no more now, you don't need to save anything, it does so automatically. Run the Editor Ok, so we can finally run the editor now, go into the LevelEdit folder and run LevelEdit46.exe There click the "New..." button and call it for example "MyWork". Double click the MyWork in the window and it shall bring up the editor in action: You'll notice the editor created a folder called "MyWork": Which contains a few key folders the editor uses: Create a map project folder inside the levels folder like so: Inside this folder you will save your Editor's "C&C_My_Map.lvl" file and stuff related to your map such as W3D models/terrain and maybe textures, cinematic text files and/or audio. ALWAYS choose to "Save Current Level As..." inside the editor ALWAYS WHENEVER you want to save your progress, do NOT EVER use "Save Current Level" (trust me), period, or it will not update some files (lsd/ldd/ddb) for your map and it wont work properly when you make a .mix with XCC later on. For example the endresult could look like this: << i will update this guide later tonight or tomorrow, just 1 thing: If you have missing textures make sure you place them in your Editor_Cache folder and reload the editor >>
-
Version 1.4.6
166 downloads
This file contains all the assets i use in my guide to set up a working environment for Renegade mapping/modding with gMax/RenX and Level Editor. View the guide @ -
-
-
-
Version 1.2
117 downloads
Flying buildings for Gmax. These include AGT, OB, PP's, Ref's, WF, Air, Bar, and HON. There are other flying buildings out there to download but these come with proxies already in place so you don't have to add spawners or purchase terminals in Level Edit. Also these are aligned perfectly with the Z axis of Zero so they don't need to be moved when placed in a level. Flatflyingproxground includes the ground around the buildings for easier adding into levels-
- 1
-

-
- gmax
- flying buildings
- (and 1 more)
-
-
-
Destructible Pillars Tutorial By: Pwn Call (a.k.a. ESCALADE) This is a tutorial that will teach you how to make destroyable pillars in C&C Renegade. Think of the scene from the movie the Matrix where all of the pillars are exploding from gunfire (only a little less epic) Here is a quick video to show you what your final outcome could look like. ----------------------------------------------- Quick disclaimer before you start. Make sure when doing this you don't put too many of these in your level as it requires a lot of meshes depending on how you make your pillars. I wouldn't recommend making the breakable tiles as small as I did in the video that was just a quick test level. Also to allow for fewer meshes you could only make them breakable in the areas that are around the height of a player where you would normally only shoot anyways so you don't make too many extra meshes. ------------------------------------------------- If you already know how to set W3D settings for objects and are experienced in map making there is a quick outline of how to set up the pillars at the bottom. ------------------------------------------------- First step is to create the core of your pillar in RenX. Create a small vertical box about .5 X .5 (depending on how you want your pillar or object) and whatever height will fill your room. For the core I recommend the texture "ref_cemnt_tmp.tga" which is from the Renegade texture pack. Also when you create the core of your pillar make sure to name it something like "core" because you will want to know what everything is by name for setting W3D options which I will explain later, also it makes it much easier to duplicate your pillar and select all the necessary parts later on. Here is my pillar with the outer "destructible" pieces near the bottom Next you will create the "destructible" part of your pillar as seen in the above image is the brown tiles at the bottom. In that picture there are 8 tiles that surround the core pillar, you will need to make these go all the way to the roof so your pillar is completely covered. Do this by selecting them from the "Top" view and then go to the Edit Menu>Clone. To move them up I would switch to the side view and I would also change your snap to grid settings to the same height as your breakable tiles so you don't have to line them up manually. Again make sure that they have a common name like "shatter" or "Break", just something so you know what they are so you can select all of them later. As you can see in this picture make sure they are outside of the core of your pillar so the core doesn't show through and they completely cover it. Here is the side view to clone them up to the ceiling. Next what you will need to do is create a collision box that is completely outside of the entire pillar and outer breakable layers as seen in this picture. Again name it something like "collision" so you know what it is. It only needs to be the height of the player but you can make it all the way to the ceiling, this is necessary because it stops the player from breaking the outer breakable layer when walking into them. Now your pillar is complete and all you need to do is set up the collision settings. If you want to make more pillars simply clone this one and move it where you want it. Create however many pillars you want and then set the W3D settings after because when clones the W3D settings are reset. So first I will go into detail on how to set up the W3D settings for the Outer collision box. First to select all of your collision boxes go to Edit>Select By> Name. Now you will want to select all of the meshes that are called "collision" or whatever you named them, this is only for the outer collision box. Once you have them all selected go to the Utilities Tab then W3D options then scroll down to where it says W3D export settings. Under Geometry you will check the Hide box and under Collision settings only click Physical. You can leave all of the other options the same, this will hide this box but make it so you run into it with your character. Now for your Pillar Core's again go to Edit>Select By>Name and select all of your cores, this time under W3D options only check Camera, Physical, and Projectile under Collision settings and leave everything else the same. And finally for your destroyable tiles around the pillar go to Edit>Select By>Name and select all of the meshes that you named "shatter" or "Break" or whatever you named them. There will be very many of these meshes. For these W3D settings check off Shatter under Geometry and check off Physical, Projectile, and Camera for Collision settings. Now your Pillars are ready to go!! All you have to do to make more is select them all and hit clone and move the new pillars where you want them. Make sure when cloning you redo the W3D options because the clones don't have any W3D options set! Play around with these settings to see what other cool things you can create. ------------------------------------------------------------------------- Quick Overview for Experienced Map Makers. Create the pillar core with normal W3D settings, Physical, Projectile, Camera Create your destructible outer meshes completely covering the core, W3D settings > Shatter on Geometry, then Physical, Projectile, Camera Create a box just bigger than all of the meshes, W3D settings > Hide on Geometry, then Physical The last box stops the player from bumping into the outer layers and destroying them.
-
Version 1.0
117 downloads
Laeubi: All models are ready to use, you just need to add them to your map (on a flat surface). Since the last version I have optimised the texture sizes and material types in other words you get better FPS. and replaced 'n_ped.tga' with 'n_pedpmc.tga' texture zunnie: For a nice tutorial to use teleporters on your map please see this topic. -
Version 1.0
58 downloads
Laeubi: This model is based on an unfinished Westwood model of a gaurd tower that can be seen in the WW building pack, I made this from scratch, I have not used the unfinished model as a base. I have included my skin of the neutral cannon emplacement that gives it a light gold colour to resemble a GDI unit. -
-
-
-
Version 1.0
74 downloads
Laeubi: I made these a while ago for some of my old maps They have been made with a single 256x256 texture (one for the green set and one for blue set) unlike other crystals I have seen that use multiple textures, which, in my opinion waste resources for very little gain. Don't forget to add the texutures to your mod folder. -
- 1 review
-
- 1
-

-
- renx
- lightposts
- (and 2 more)
-
-
-
Version 1.0
146 downloads
I've been trying to put together a collection of pine trees for the last few months, for some alpine maps I was working on. Figured it would be a good idea to release a pack so people can start adding them to maps they are making, or even revive some old maps by adding them to it. Polygon counts are all different ranging from 185-2200. The tallest and bushiest ones are to be used sparsely since they are 2k polygons each. -
Version 1.2
265 downloads
Package was compiled by Reaver11 over the years and released to public. Much thanks to him Contains: Automaticshotgun Beta Chaingun Beta HUD Black500sniper Chemsprayer Conversations Door_a GDI Acrolyte GDI Adv Commcenter GDI AdvPowerplant GDI Airstrip GDI Constructionyard Single player GDI Door GDI Elevator GDI Elevator2 GDI Grenadier GDI Guardtower GDI Gunboatsinkanimation GDI Harvester GDI Harvester Skin GDI Humvee GDI Initiate GDI Logan GDI Mammoth Tank GDI Mct GDI Medium Tank GDI Multiplayer Helipad GDI Orca GDI Orcalifter GDI Outpost GDI Ref elevator GDI Ref Piston GDI Refinery GDI Repbay GDI Silo GDI SingleplayerPP GDI Tailgun GDI Templar Infantryaggregates Laserchaingunskin Laserrifleskin M16 M203 M203-2de Machinegunemplacement Misc MOD for SP with beta assets! Movies Music Mutant test facility NOD AdvPowerplant NOD Alternative adv pp (not beta) NOD Apache NOD Bike NOD Buggy NOD Cargoplane NOD Cargoplane cockpit NOD Cargoplane crash animation NOD Cargotruck NOD Chair NOD Commcenter NOD Constructionyard with collision NOD E3 Hand of NOD NOD Elevator NOD Flame tank (With turret settings) NOD Gun Emplacement NOD Harvester NOD Hover Craft NOD Light tank NOD Light Tank2 NOD Mct NOD Mobile gunemplacement NOD Multiplayer Helipad NOD Outpost NOD Refinery NOD Repbay NOD Sakura NOD SamBunker NOD Samsite truck NOD Scorpion NOD Seth NOD Silo NOD Singleplayer Hand of NOD NOD Soldierskins NOD SU-8 NOD Trooper NOD Turret OLD Commando PC Gamer October 1999 PCT Icons Pistol Pistol2 Pre-Release info Railgun Rocketlauncher Screenshots Silencedpistol Silver500Sniper SnipeTowerNeutral Sounds Streetlight Textures TimedC4 Under rock texture