Search the Community
Showing results for tags 'leveledit'.
Found 12 results
-
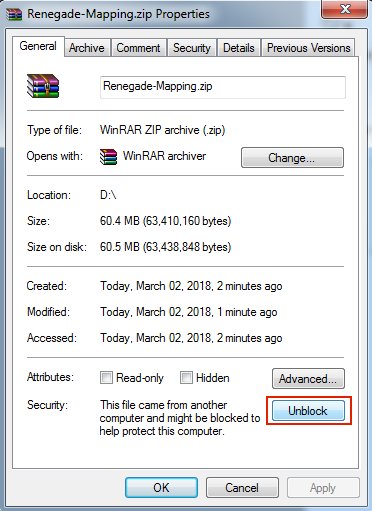
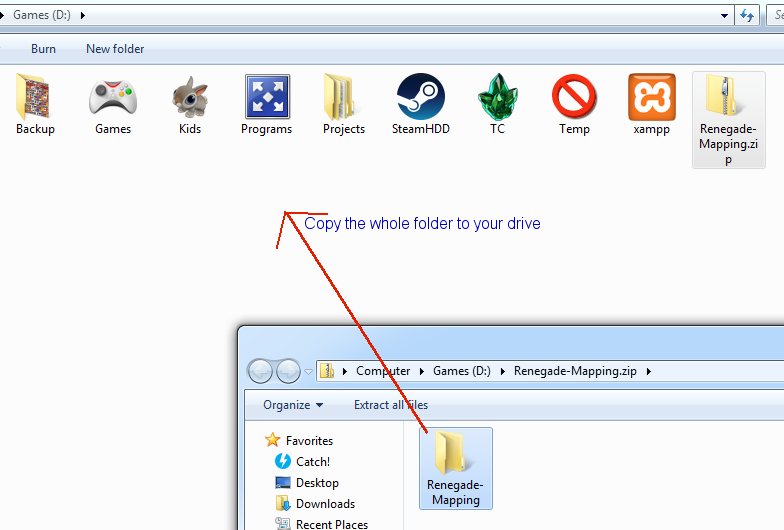
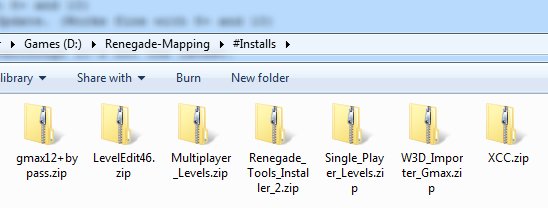
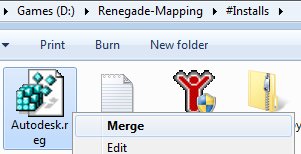
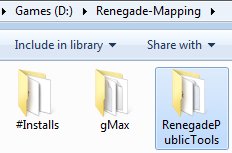
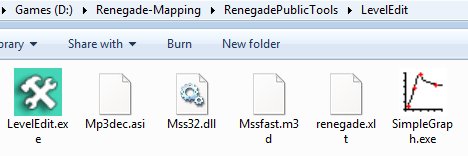
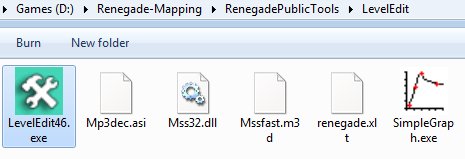
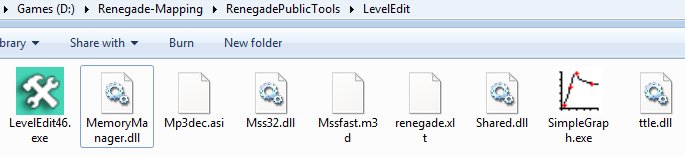
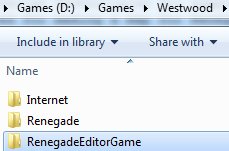
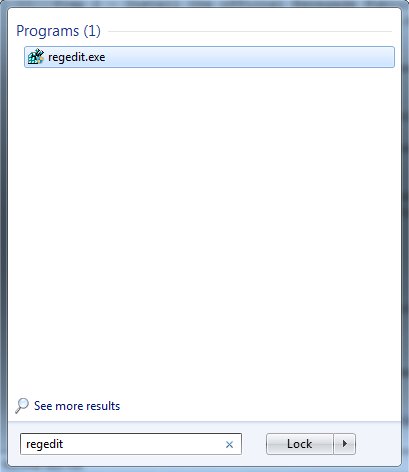
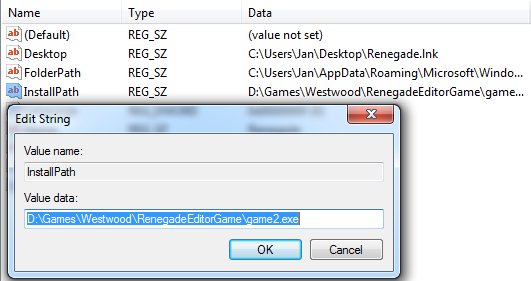
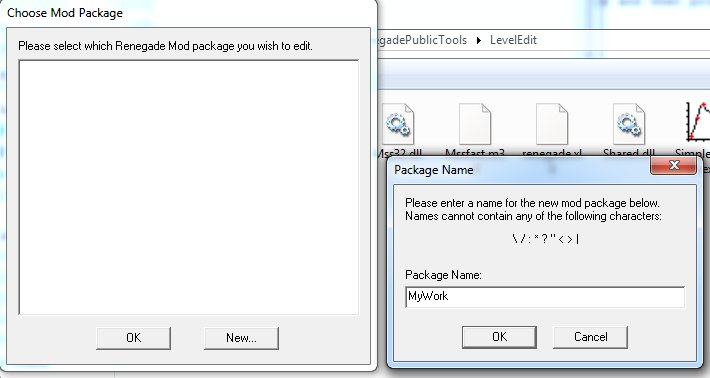
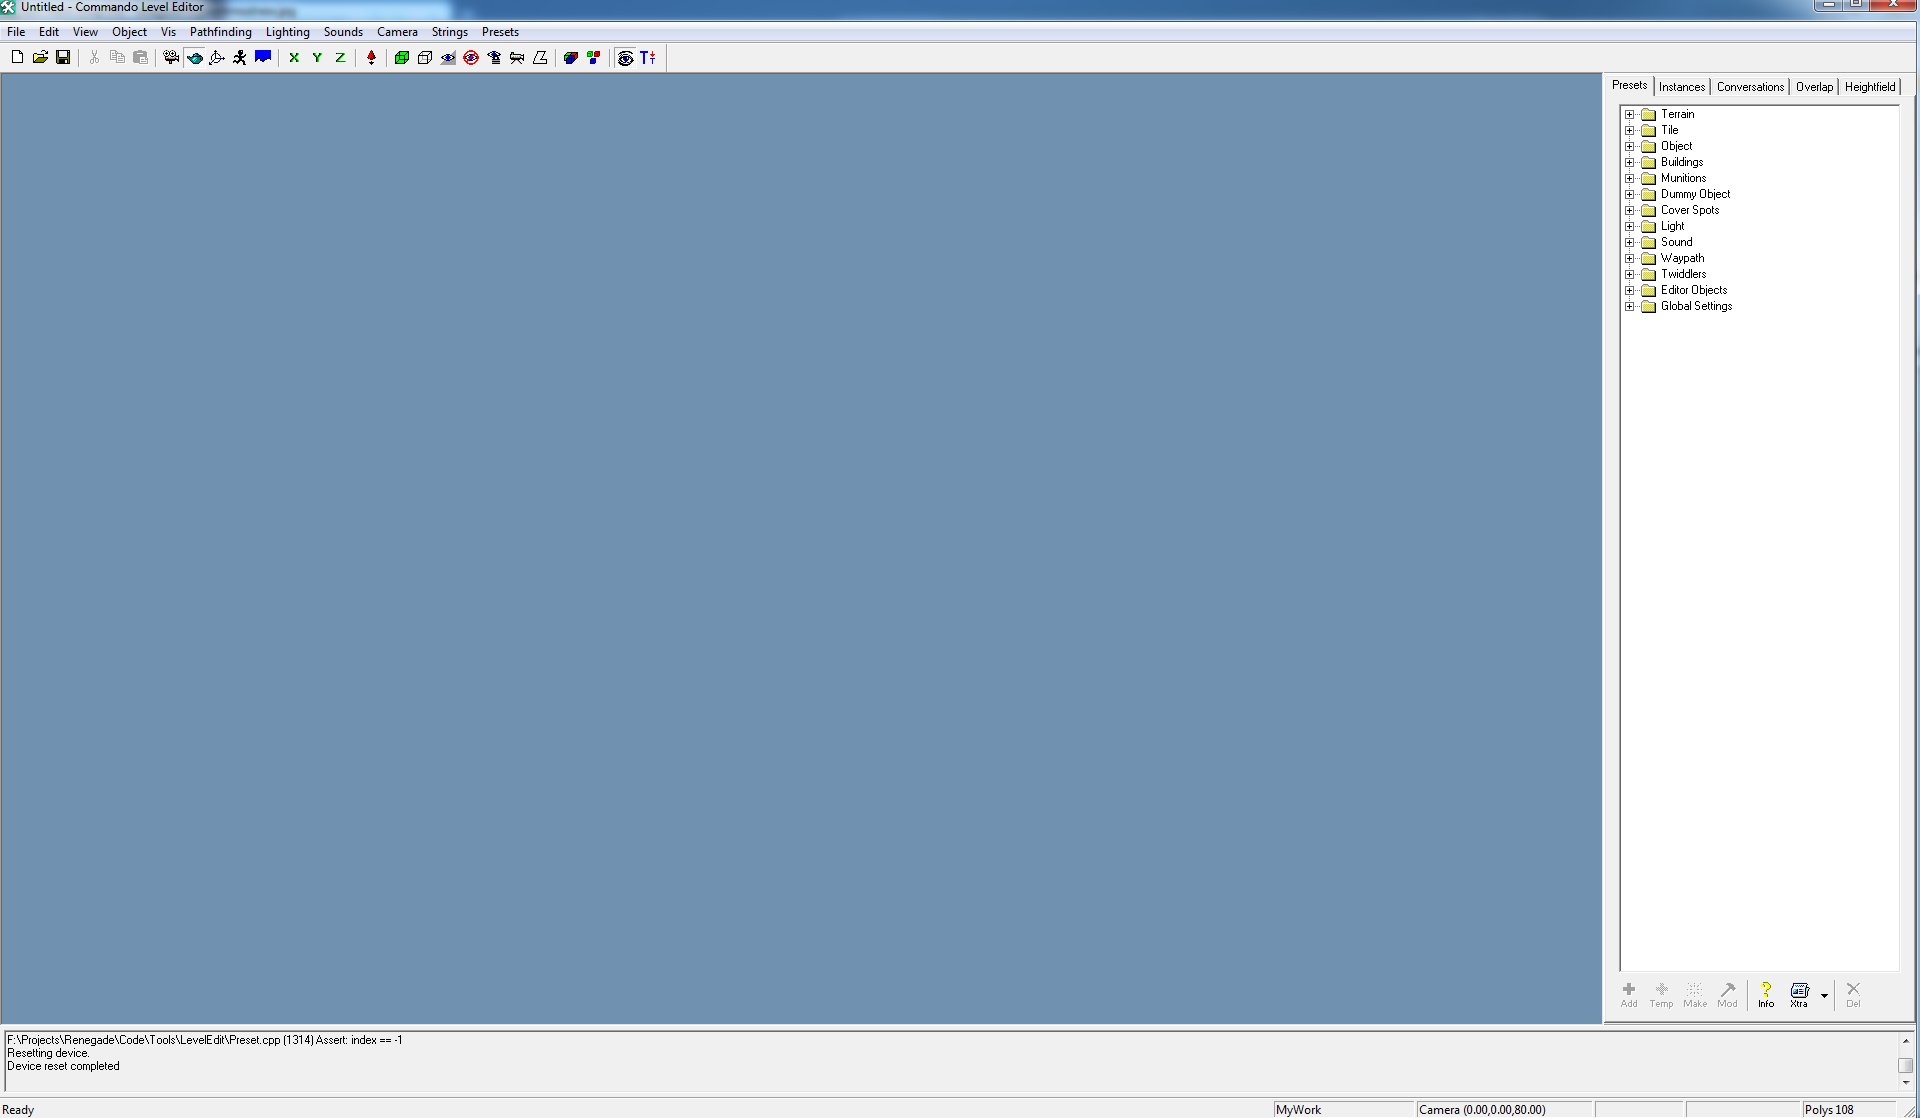
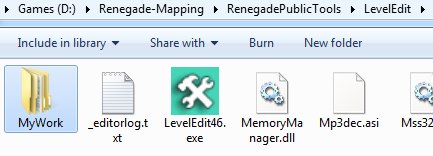
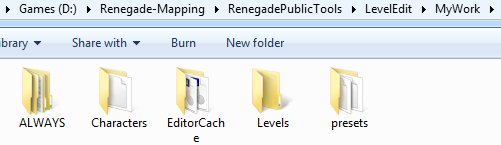
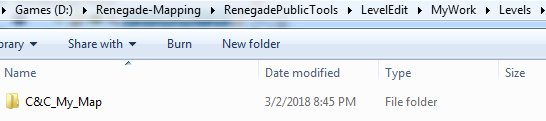
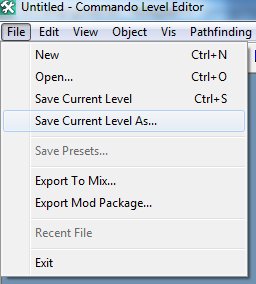
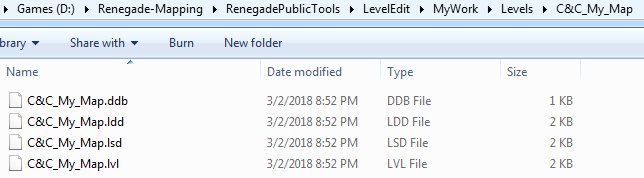
 The Environment Setup Tutorial This tutorial will attempt to learn you how to setup your entire working environment for creating maps in gMax and the free provided Renegade Public Tools v2. It includes all the tools you need and they should be installed in this particular order: 1- The gMax Installation Files and Registration ByPass. (NOTE: Windows 8+ and 10 are NOT supported, you'll need Windows 7 or XP Pro to use gMax without glitches, there is NO fix for this.) 2- The official Renegade Public Tools version 2 from Westwood Studios. (Works fine with 8+ and 10) 3- The unofficial LevelEditor from Tiberian Technologies for support with 4.6 Scripts Update. (Works fine with 8+ and 10) 4- Some (semi) Critical Assets required for making a map for Renegade in gMax/RenX. 5- The XCC mixer i personally have been using since i don't know when, it's the best eventhough it's not the latest. Environment Guide Package Download the file i prepared as zip from the MPF download area: Once it is downloaded, make sure you unblock the file by going to the zip properties and clicking "Unblock" BEFORE you extract it. In this tutorial i will install EVERYTHING to do with mapping for Renegade in my folder on the D drive in "Renegade-Mapping". Go ahead and extract the zip somewhere, open it in a new window: And then copy the contents somewhere: Go into the #Installs folder that you extracted inside the Renegade-Mapping folder Step 1 - Install gMax and apply the registry fix We need to install gMax first, you MUST install it first or it won't work properly later. Open the gmax12+bypass.zip and copy files into your #Installs folder and then run gmax12.exe to install it. In this guide i am installing directly into the Renegade-Mapping folder so the endresult will be something like the following: Now, because the author of gMax doesn't send out emails anymore to register gMax for free, there is included a Autodesk.reg file, right click on that and choose Merge and when promted do Yes to merge it. When installation is done and you merged the registry thing, then run gMax for the first time. You will be prompted to select a rendering device, here you choose "Direct 3D" and continue. Once it has fully loaded you must exit gMax again. Step 2 - Install the official Renegade Public Tools v2 Extract the file Renegade_Tools_Installer_2.zip and run the executable, install it into your Renegade-Mapping folder, endresult should look simular to this: Go into the folder LevelEdit and you will see these files: Now delete (yes delete permanently) the LevelEdit.exe that is currently there, the original from Westwood. Extract the file LevelEdit46.zip and copy the resulting LevelEdit46.exe to your LevelEdit folder like so: Goto your Renegade GAME folder, which you updated to the latest TT Script Update (available on http://www.tiberiantechnologies.org ) Copy the following files to your LevelEdit folder and overwrite any existing ones there: "MemoryManager.dll" "Mss32.dll" "Shared.dll" "ttle.dll" You should end up with a LevelEdit folder looking like this: Now make a complete copy of your Renegade game folder (which is updated to 4.6 of course) and name it "RenegadeEditorGame", just copy and paste it somewhere like: Now open the Registry Editor through your startmenu "search" option type: regedit and open it. Expand the folders (or keys as they are called) until you are inside the Renegade folder/key. "HKEY_LOCAL_MACHINE -> SOFTWARE -> Wow6432Node -> Westwood -> Renegade" You see the InstallPath option there? Double click on it and change its value to where your game2.exe is located in the RenegadeEditorGame you copied earlier, in my example here it would be: D:\Games\Westwood\RenegadeEditorGame\game2.exe Now close the Registry Editor program, we don't need it no more now, you don't need to save anything, it does so automatically. Run the Editor Ok, so we can finally run the editor now, go into the LevelEdit folder and run LevelEdit46.exe There click the "New..." button and call it for example "MyWork". Double click the MyWork in the window and it shall bring up the editor in action: You'll notice the editor created a folder called "MyWork": Which contains a few key folders the editor uses: Create a map project folder inside the levels folder like so: Inside this folder you will save your Editor's "C&C_My_Map.lvl" file and stuff related to your map such as W3D models/terrain and maybe textures, cinematic text files and/or audio. ALWAYS choose to "Save Current Level As..." inside the editor ALWAYS WHENEVER you want to save your progress, do NOT EVER use "Save Current Level" (trust me), period, or it will not update some files (lsd/ldd/ddb) for your map and it wont work properly when you make a .mix with XCC later on. For example the endresult could look like this: << i will update this guide later tonight or tomorrow, just 1 thing: If you have missing textures make sure you place them in your Editor_Cache folder and reload the editor >>
-
-
Version 1.4.6
166 downloads
This file contains all the assets i use in my guide to set up a working environment for Renegade mapping/modding with gMax/RenX and Level Editor. View the guide @ -
RenX / Leveledit First of all, some things you should keep in mind about elevators: an elevator might cause problems if there are alot elevators, or if people try to use the same elevator at the same timewith a slow connection (56k for example) people might fall "through" your elevator and popup at the top after some secondselevators can NOT transport vehicles! You should always take care that the Transition Zones (explained in the tutorial later) are not reachable for vehicles because the wil get STUCK in them!elevators often cause problems with beacons, if you try to deplay them ON the eevatro plattformFisrt Step is ofcourse, create your elevator. This is myone. Ok its not very nice but thats a 2 min one Basicly an elevator has a platform (in this image the red parts), and a door (the blue parts). Of course an elevator can also have other parts in the deep of complexy you want but for this tutorial this is the best choice. Always create your elevator in the center of RenX/Gmax.To get an ide of the size of an elevator, the Single Player ones have an aprocxiamte size of L: 6m, W: 6m, H: 12m You can create a box with these settings to get an idea if your elevator has the right size: (my elevator is a bit too big as you can see, but the size is your choice, you just get a general idea about the size with this method) Because the Rengade-Engine don`t like textured objects that are moving we now create some "cages" that later will be invisible, but responsible for the collision parts. These are basicly just meshes without a texture that covers that elements, that later collide with players. Activate the W3D hide and collision Settings: Vehicle, Camera, Projektile, for the textured Meshes don`t activate any Collision Settings. Now it is time for the animation, an elevator has 3 Animation stages: Stage 1: (Baseframe) Move all your parts of the elevator so it is on the Top-Part, with the door open for enter at the Top: As you can see I just moved the whoe plattform up, and lowered the ring so if the player can enter the elevator at the top. Stage 2: (On the move) Now klick the animate Button, Goto Frame 1 and move your door so it is closed (you can use more than one frame if needed, just note this framae somewhere) Now on the trackbar goto frame 10, and move the elevator down, so it is on the botom with an closed door (same comment as before for the cloe door thing): The best is you note this frame on a paper or something, because you`ll need this later. Stage 3: (Final Animation) Now just make an animation when the door moves down, so you can leave the elevator. My one ends on frame 11, because only one frame is used for open the door in my example, of course you can use as many as you need: Now you`r finihed with this, deactivate the anim Button and feel good that the work is nearly done. Export the elevator to your Modpacket: Export it as HirachyAnimated Model and from Frame 0 to the last frame (in my example frame 11): Open the Commando (Leveleditor), browse to Tiles and press the Add Button Now enter a name, e.g. my_elevator, and switch to the Settings Tab Change the type to ElevatorPhys, Select your W3D and change Collision Mode to STOP, Animation Mode to Manual. Scroll a bit down and set DoorClosedTop to the frame when the door at the top is closed (that is frame 1 in my example), DoorOpeningBottom to the frame where the elevator is at the bottom with open door (Thats frame 11 in my case) ElevatorStartTop that is in nearly all cases frame 0 ElevatorStoppedBottom this is the frame where the elevator is at the bottom with closed door (Frame 10 in my case) Now cahnge the CloseDelay to the Time the elvator should need to go up/down and press OK and your nearly ready for test your elevator. Ok, now its time to tell the elevator where people will wait to enter: Select your elevator again and press Mod, goto the Zones Tab. You see 4 Zones: LowerCallZone: Defines the zone where the Character has to stay in to call the elevator to come to the bottom LowerInsideZone: When you are inside this zone the elvator starts to move Up UpperCallZone: Same as LowerCallZone but for the top UpperInsideZone: Same as LowerInsideZone but for the top When you doubleclick you can adjust the zones t the size / position you need. First / Lastframe switsche between the start and end frame so you easy can adjust the zones. Adjust now all zones like it is explained above. Here are mine: LowerCallZone LowerInsideZone UpperCallZone UpperInsideZone Now press OK and your done with the setup. Load your Level and select your elevatzro then press Add and it will apear on the map: Export your Map and test the elevator Congratulation! You can now go up and down with your elevator as long as you want.
-
You can find a bunch of nice old CNC tracks on my website at zunnie.multiplayerforums.com When you decide to use one of these on your map you must keep the filename exactly like it is there. Why?: Some other maps already use this MP3. To keep a long story short: If you rename them then there may arise conflicts with other maps. So nonono.mp3 to renaming them. Just use them on your map as they are. Edit: In 4.1 and on renaming them won't matter. Still i'd leave them as they are Let's get started: (1)expand Sound, then (2)select Music and then (3)click the Temp button: Give it a name, for this example it is Frank_Klepacki_Act_On_Instinct: On the Settings tab now we configure the following options: Filename - Browse for the MP3 file inside your Level Mapname folder Drop-off Radius - 7000.000 Max-Vol Radius - 6000.000 m_Volume - 1.000 m_Priority - 1.000 All other settings are correct already and need no attention. Now OK it all. Then (1)select the preset in your list and (2)click the "MAKE" button, a sound icon appears on your map. It is best if you place this music icon in the center of your map. If you have a large map you may need to adjust the Drop-off Radius and Max-Vol Radius to a higher number. Have fun
-
I decided to have a topic for miscellaneous tips and hints that you might not know about in Level Edit, Renx/3ds Max, or some of the other editing programs. If you have a hint or tip to add to the list post it and I'll add it. Ren X Grid - Using the grid function helps you to line up your meshes without having to zoom in super far and manual align them. It can be turned on by left clicking on the Magnet with the 3 icon in the lower left part of RenX like so To change the distance that it snaps to simply right click on it and a menu will pop up, go to Home Grid then change the Grid spacing to your desired distance. You can tell if your grid is on if there is a large cyan cross over your cursor like in the below image Also when using the grid remember not to move an object by grabbing the X, Y, or Z arrows as those will move the object without the grid spacing on, move it by selecting the object itself. Level Edit Creating Good Lighting/ Fixing some texture glitches - So if you want your map to have good lighting in Level edit go to the Lighting tab then go down at the bottom and Compute Vertex Solve. This adds shadows to your map and fixes some minor texture glitches! Stamping Objects - I actually just stumbled upon this by accident but you can use a preset as a stamp tool. To do this create the object that you want. Once it appears move it to the position you want that preset. While holding down left click on the object right click and it will put that object in that position. You can do this as many times as you want. It is really useful if you want a bunch of presents around an area because you don't have to hit make everytime then move them to the position that you want. That is all that I have for now, if you know of any that would be good additions post them up, not every simple trick is general knowledge to everyone.
-
So you want a teleporter for players on your map? This is possible. I made two scripts for this purpose, one that teleports anyone, and another that teleports only players from a specific team. Ofcourse you can use other scripts for this but i will focus this tutorial on the two i made myself which are available in 4.0 The two scripts are called "z_Enter_Teleport_Random" and "z_Enter_Teleport_Random_Team". You can also use this for the teleporters as it looks much cooler than a stupid pedestal: http://multiplayerforums.com/index.php?/files/file/212-teleport-tubes/ First lets move on to the Editor and we place a CtfPedestalGold on the map which will function as the visual indicator for this teleporter, stepping on this pedestal will teleport a player to another location. Expand (1)Object, then (2)Simple, then (3)CTF_Objects and finally select (4)CtfPedestalGold Now click the make button and it will appear on your map: Now, the way my scripts work is simple: You place 5 "Daves Arrow" on your map, the ID of each of these Arrows are used by the script and randomly select one of them to teleport the player to. So we are now gonna place 5 of these Dave Arrows on the map. Expace (1)Object, then (2)Simple, then select the (3)Daves Arrow and (4)make 5 of them on the map near the location where you want players to teleport to: Now double click on each of the Arrows and note their ID in notepad: In my example they are: 100438 100439 100440 100441 100442 Now that we have the ID's let's finally actually create the area that will teleport the player. Expand (1)Object, then expand (2)Script Zone and there select the (3)Script_Zone_Star and click (4)Make to place one on your map. A green box will appear on the map, position it over the pedestal, you can resize it with the black boxes at each corner, hold shift to size it up and down. Make the box appear like on the example screenshot below: Now double click on the green box, a new window will appear. Goto its "Scripts" tab. There click on "Add" and scroll down to z_Enter_Teleport_Random and select it. Here you enter all the five ID's we wrote down in Notepad earlier: The endresult should look like this (based on my example ID's above): Now save your map, make a mix file and try it out! Players that step on the pedestal will be teleported to the locations of the Dave Arrows you placed randomly. PS: If you want a TEAM oriented teleporter then use z_Enter_Teleport_Random_Team and do the same thing but with Team enter 0 for Nod and 1 for GDI, then only players of that team can use the teleporter.
-
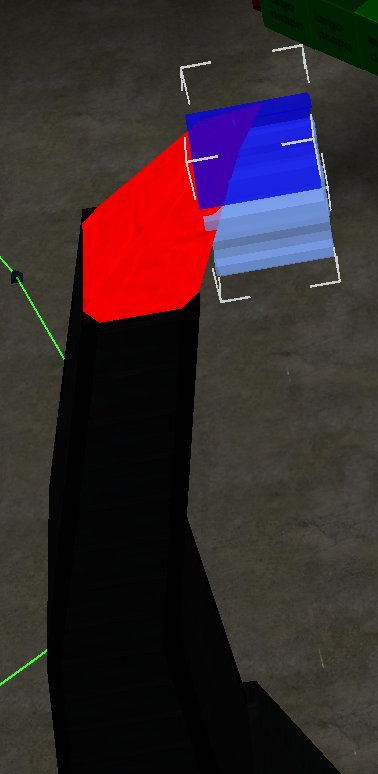
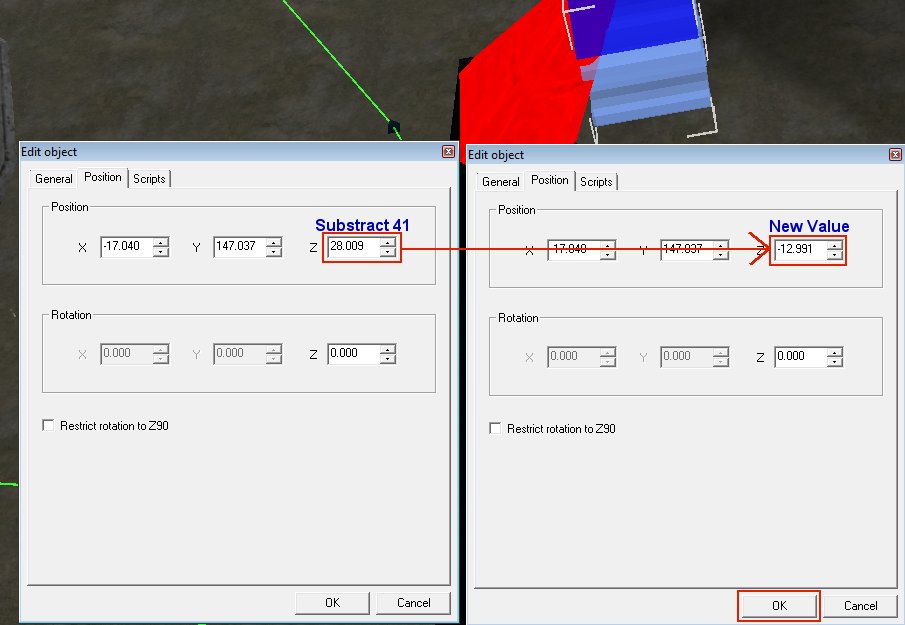
Place the obelisk controller like this on the Obelisk in your map: Goto the properties of the obelisk controller and substract 41 from the Z value, enter the new value in the Z box and press OK. In this example: Old Value = 28.009 Substract - 41.000 New Value = 12.991 The controller will jump underneith the map, this is fine, and supposed to happen. Now when you play your map the obelisk will fire from the red top.
-
Always wanted to have this special feature on your server where players can buy a Logan instead of a default Sniper on GDI? This tutorial explains how to do just that. Of course you can apply this knowledge to any other character in the purchase menu as well. First of all open your LevelEditor :durr: and then expand the category (1)"Global Settings", then expand (2)"Purchase Settings" and click on the "Character Classes (GDI)" and finally click on the (3)"Mod" button at the bottom of your LevelEditor: Once done, you are presented with a mod edit screen like the image below. First click on the "Settings" tab and then scroll down until you see "Entry 4" which is for the Sniper on GDI. It has a weird name, blame Westwood for that lol. Click on the little colorful button at the right which i labeled a blue "1". Then proceed and click the "+" in front of the presetname "CnC_GDI_MiniGunner_2SF", a new entry lists with "_Logan" added to it. Select that preset at the blue "2". Now press OK and you're done. Save the presets by exiting the LevelEditor and choosing Yes when it asks to save the presets. Then goto your presets folder and rename objects.ddb to objects.aow and load that in your tt.cfg of your server. Example tt.cfg to load a custom modded objects.aow file: gameDefinitions:{ Field: { mapName = "C&C_Field"; serverPresetsFile = "objects.aow"; };};rotation:[ "Field"];downloader:{ repositoryUrl = "http://ttfs.ultraaow.com/";};Now when you start your server players who buy the GDI Sniper will actually get the GDI Logan to snipe with.Greetz zunnie
-
With this method you can easily change the properties of a Refinery serverside like the credits/sec you get, how much money you get per dump and how long it takes the harvester to dump its tiberium. Startup your LevelEditor and expand the folder (1)"Buildings", then expand the folder (2)"Refinery", there select either the mp_GDI_Refinery or mp_Nod_Refinery. Then goto the bottom of your LevelEditor screen and click the (3)"Mod" button once: Once you pressed the "Mod" button you will be presented with this mod-dialog-box below. Goto the Settings Tab and scroll way down: 1) - Sets the time it takes for the harvester to unload at the Refinery, set to 10.000 for 10 seconds for example 2) - Sets how much money you get when the harvester is done dumping, default is 300.000 for $300 3) - Sets the amount of money you get every second when the Refinery is alive, set to 5.000 to get $5 a second or any high you want I hope this helps you with whatever you are doing Note that this is 100% serverside and you can just save the presets when you exit LevelEdit, then goto your presets folder and rename objects.ddb to objects.aow Then load objects.aow in tt.cfg with for example the following configuration: gameDefinitions:{ Field: { mapName = "C&C_Field"; serverPresetsFile = "objects.aow"; };};rotation:[ "Field"];downloader:{ repositoryUrl = "http://ttfs.ultraaow.com/";};
-
RenX / Leveledit Download the MCTs Here or PCTs Here These MCT`s were developed by Bumpaneer with help from Abjab and StoneRook. The PCTs were developed by Bumpaneer with help from AircraftKiller and StoneRook. These soldiers made this project possible. Thanks most certainly goes out to them. Feel free to use these MCTs and PCTs in any map/building you create, but please remeber to include Bumpaneer in the credits. *These instructions only cover setting up MCTs. To set up PCTs follow the same instructions, but DO NOT check the "IsMCT" box* To set up the MCTs for use, first open one of the two files in RenX. Click on a mesh, and go to the Modify tab on the right hand side of the screen (looks like a blue arc). Click on the name for the mesh and replace the default "prefi" with the prefix for your building. You can use no more than five characters for this. Remember most of the Nod buildings start with "mn" while the GDI buildings start with "mg". You have to rename every mesh that starts with "prefi" but DON`T change anything besides that (as far as names). If you want another texture, feel free to use whatever you think looks best. The next step is to export the MCT for use in Level Edit. Goto the File menu, then to Export. On the first screen that pops up, give the MCT a name. A good naming convention is "prefi_mct" where "prefi" is replaced by the prefix for your building. You should save the MCT into the main folder of your mod. On the next screen that pops up, make sure that Hierarchical Animated Model is selected, and then click OK. The MCT should export without any errors or warning messages . Once you have the MCT all exported, open up Level Edit. Choose your mod in the opening screen, and then browse to mgpwr_ag_3n to set up a GDI MCT or mnpwr_ag_3n to set up a Nod MCT. Single click on the file (shown at right) and then click the Temp button at the bottom. A screen like the one below will pop up. On the first screen that you see give the Tile a name. Once again the "prefi_mct" form works well here ("Prefi" is replaced by your prefix). After you have the name typed in, goto the Physics Model tab (second tab). Browse down until you see the checkbox indicated, IsMCT and make sure this box is checked. Then click OK. A Tile with the name you gave it should appear. You can drag this tile under another menu if you so desire, so that it is organized. To get the MCT on the map, click on it`s name and click the Make button. You will then be able to highlight the MCT and drag it to where you want it. I hope these instructions have been helpful, and good luck with all your projects. ~Bumpaneer
-
RenX / Leveledit Make your own Building: a Step by Step to create a full functional building like the Westwood ones. Important!! Read this tutorial carefully. If something didn`t work as you have expected it, check the coresponding part of the tutorial if you have not miss a thing. First of all, of course you need you building. I used for this tutorial is the Atreides Weapon factory for the Battle for Dune Mod It is important that you move your whole building to the center of RenX. You also should already have setup all collision settings. Now select all the meshes that are part of the EXTERIOR. This should be all parts of the exterior of the bulding, excluding any emitters, animations or doors. Then goto the W3D-Tools --> Assign Node Names: In the following dialog uncheck/check the Options you see on the screen below, enter at the Root Name: entry a short name, e.g. atrwep (atreides weponfactory) followed by a ^. You should write this down. because youll need that later, I`ll refer to this name as the Meshprefix later. The Meshprefix should NOT exceed 6 characters. Congratulation you have now created a buildings exterior. Now goto Group --> Group and enter a name (e.g. wep_ext) Now hide your ExteriorGroup and unhide all parts of the interior, again excluding any emitters, animations or doors. Again select all meshes and open the same dialog as for the interior. Enter the Meshprefix followed by a #. Again Group this and name it for example wep_int: Now we will add the doors, emitters as well as animate them for the later use. If you have already done this, you can just skip this part. For the doors I`ll use the standard Rengade MP ones, but of course you can make your own ones. As you can see, I have unhidden the Ext/Int-Group to better align things. For the doors you need the name of the preset of the door, the standard Rengade doors name is `mpdr_0` create a box 1x1x1 at the topview, and place it at the location where the door should be placed, name the box : mpdr_0~ (or the name your door-preset has in Leveledit + a ~ ) add a 00 after the ~ for the first, a 01 for the second and so on. When you have placed all doors, group the doors e.g. as wep_doors. When you are done with the doors, you need some damage emitters. You can make your own with W3D-Editor or use Renegade ones, extract them with XCC_Mixer you can identify them by the leading e_ (e.g.e_19fire1.w3d). For all Emitters you should extract (or download) the e_master01.tga so you can see the emitter effects: Now create three boxes (1x1x1) named: emitter0, emitter25, emitter50, emitter75. I will refer to this as the `DamageBox`. After that, create 1x1x1 boxes named like the emitter file (without the w3d) that should be displayed later, in this case e_fire1. I will refer to this as `EmitterBox`. IMPORTANT: Never just rename the emitter file!! You must edit the name in w3d-Viewer and re-export it or the file will not be loaded or even crash Renegade!!! Now link the EmitterBox to the DamageBox emitter75 if this emitter should be showed up at the state for when the building is 25% damaged, emitter50 for half damged, emitter25 when the bulding is damaged by 75% and emitter0 when the building is detroyed. For this use the Link tool and klick and drag from your EmitterBox to your DamageBox (The damage box will flash for about 2 sek when this is done succesfull. Then place all around your building emitters or objects that should be displayed at the different states and link them to the coresponding DamageBox. I recommend to save your work now if you have not done this before!! Now we must make an animation, so Renegade later know what parts must be showed at the damage states. For that you should reopen RenX, because the `Trackview` that we will need often conflicts with the RenegadeMaterialEditor for Gmax, restarting RenX solves the problem. Open now the `Trackview`: On the Trackview browse to Objects --> emitter75: Add a visibility track by clicking the eye icon that will add a new option to your Object: Click on the new option and add via the at frame 1, 2 and 3 a new key. Rightklick the first key and change the value to 0 (invisible) Now change this also for key2. The trird key must not be changed and should stay at value 1 (visible) Repeat this process for all other DamageBoxes, but switch the keys to the following: When you have done this, group all DamgeBoxed and the EmitterBoxes e.G wep_emitter emitter50 frame 1,4,5 emitter25 frame 1,6,7 emitter0 frame 1,8,9 Now we will prepare the PT and the MCT (This is optional) Your PT`s and MCT can have also animations like the damage emitters. For the PT`s you might want to add animations for a powerless building like westwood does. for thsi jsut create four more emitter boxes( emitter0p, emitter25p and so on) and count up the last frame by one for each state liek you have seen in Section 6. Select all MCT Meshes and use the naming tool that is described in Section 2, and use as a basename the meshprefix#mct (e.g. atrwep#mct). repeat this for the PT`s also but use meshprefix#pt here (e.g. atrwep#pt) Group all your PT`s and the MCT to a seperate group, e.g. wep_pct and wep_mct Exporting time. Now you must export all parts for the use in Leveledit. Export: * the Interior Group as mesprefix_int (Renegade Terrain) * the Doors Group as meshprefix_doors (Renegade Terrain) * the Damage and Emitter as meshprefix_dam (Hirachy Animated Model) * The MCT Group as meshprefix_mct (Hirachy Animated Model) * The PT Group as meshprefix_pt (Hirachy Animated Model) In my example I`ll get 5 files: atrwep_int.w3d, atrwep_doors.w3d, atrwep_dam.w3d, atrwep_mct.w3d, atrwep_pt.w3d Copy all these files into Your modfolder if you have not done this already, a seperate folder e. g. buildingparts would be a nice idea. Setup your exterior mesh for use in Maps. You might wonder what will happen to the exterior mesh. We must jsut setup some very simple parts to finish this: create a box from the TOPVIEW (1x1x1) in the EXACT center of Gmax/Renx. Name this box meshprefix_int~, then clone the box (or create a new one) and name it meshprefix_doors~ and so on for all w3d`s you have exportet in part 8. then select all these boxes and activate the [x] Hide and [x]Aggregate w3d option. After that select your ExteriorMesh and these Boxes and group them to for example AtreidesWeponfactory and save your work. You can now Merge this Group into your map(s) like the orginal westwood buildings. Setup everything in Leveledit. Now start the Leveleditor and Load your Modpackage. Goto Terrain-->Add and enter a name, e.g. mybuildings Select this new group and press again add. Enter as name meshprefix_doors (e.g. atrwep_doors) and under the settings tab under m_Modelname select your _doors w3d file. Repeat this part also for the mesprefix_int w3d file, you`ll then has 2 new entry`s: Now change to the Tiles Tab and again press add create a new entry named: mybuildingtiles under the Physics Type select BuildingAggregate. Select this new group and once again press add, enter as name: meshprefix_dam, under the Physics Model be sure that the type is Building Aggregate, change the Model Name to your coresponding w3d file, the AnimationMode to Manual Scroll down to the Building Behavior Settings and change the AnimLogicMode to ANIM_LOGIC_SEQUENCE. The Buidling state for 75% to 1, 1 as showed below, for 50% 2,2 for 25% 3,3 for detroyed 4,4. Repeat this also for the State: Power OFF. After that press OK, again use the add, now enter as name: meshprefix_mct (e.g atrwep_mct), select the needed w3d, setup everything like before, but check the checkbox labled [x] IsMCT. If your MCT also has animation sequences, you must set them up coresponding to your animation as described above. Again add another tile, name it meshprefix_pt, set it up as explained for the MCT, but let the [ ] IsMCT uncheked. Now you have three new entrys in your mybuldingstiles group: Congratulations!!! You are finished now. Add your Building Group you have created in part 9 to your map via the MERGE command in RenX/Gmax, export it as Renegade Terrain and enjoy your bulding. One Last Step: To make your building work ingame you have to Clone wia the ADD button one of the Buildingcontrollers, for example mine is a Weponsfactory, so I clone the GDI_Weponsfactory: You can name it whatever you want.... but you must fill in the MESHPREFIX into the coresponding field: Of course you can edit other settings like health in this dialog too,play around abit with these settings Have Fun by detroy all your hard work ingame