Search the Community
Showing results for tags 'water'.
Found 2 results
-
Version 3.0.0
154 downloads
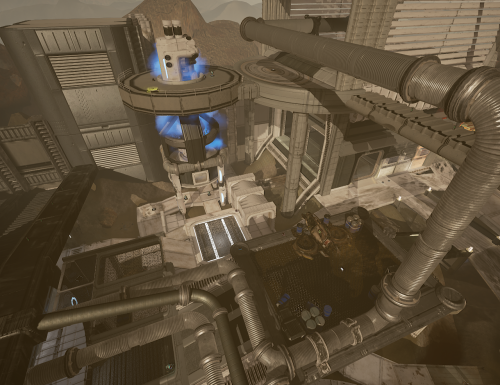
This is my second map released for Unreal Tournament (4), using the Unreal Engine 4. Meant to be played in Deathmatch or Elimination, it's a rather large map focused around a wall-enclosed lower compound with two main facilities on opposite sides. The arena takes place on a barren world within a functional but aging water plant constructed to catalyze and redistribute the fuel sources extracted from the local water lakes. You'll find at least two spawning points for all weapons -- as well as nearly every single type of powerup -- across the entire level. There are multiple elevators and jump-lifts that can be used to rapidly reach the upper locations, and in addition there are a variety of areas to both hide and snipe, with the general lighting dim enough that many locations are shadowed to prevent easy exposure. Completion of the level took about 50 days, with on-and-off development throughout the project. Please post feedback, such as bugs, performance rate, unaligned textures/meshes, or just general gameplay experience (flow of the level). <EDIT> Map has been updated and overhauled as of February 23rd, 2017. Look below at What's New in Version 3.0.0 for more updated details. Enjoy! Path=/Game/RestrictedAssets/Maps/DM-Reservoir-V3 - MapRotation=/Game/RestrictedAssets/Maps/DM-Reservoir-V3 - PackageChecksum="6b8bb4b2831721f6e20ec4ba76ac9626" -
Original Authors: Bumpaneer, StoneRook and Andre First step, I’d like to give big thanks for Bumpaneer on allowing me to write this tutorial on realistic water making for Renegade. Well, let’s get started. Load your Ren-X and make a plane 10x10 or bigger. Remember this is only to get you started, once you learn this tutorial, you will be able to make the water any size you wish. Press the M key on your keyboard, which should open the Renegade Material Editor. Click on the blue box icon (Make New Renegade Material) to avoid conflicts between a material already used in other object. Then, change the Pass Count to 2 and select the Surface Type (Naturally Water) as show in the picture below: Usually, when you start by the Pass 1 tab, Ren-X crashes, so let’s move on to Pass 2 tab, then we come back to set up the #1.Click on Vertex Material tab on Pass 2. Make sure Ambient, Diffuse, Specular and Emissive colors are black. Under the "Stage 0 Mapping" (bottom Left of screen). Select the drop down box to the right of Type and select "BumpEnv". And fill the box Args below with: BumpScale=0.2 BumpRotation=0.3 VPerSec=-0.01 And don’t forget to change the Stage 1 Mapping Type to Environment (Basically to make it reflective) as shown in the picture below: Now let’s move to the Shader tab (Still inside Pass 2 Tab). Select the Blend Mode to Add. On the Advanced (Still on Shader Tab, but on bottom), select the Pri Gradient as Bump-Environment and the Detail Color as Add. Watch picture below: Now let’s move to the Textures tab to set up the textures and the details of the water and it’s movement. Check the Stage 0 Texture and click on the None button to select the proper texture. Use the texture called bump_water.tga here. Now check the Stage 1 Texture (Detail Texture) and click again on None button and select the texture named water_reflect.tgaOn next page you are going to see how your Textures tab should be after setting up all these changes. Once you are done with setting up Vertex Material, Shader and Texture tabs on Pass 2, click on the button shown on the picture (Assign Material to Selection) to apply the changes to rhe object. Now let’s move back to Pass 1. On Vertex Material Tab, change the Stage 0 Mapping Type to Linear Offset and add VPerSec=-0.01 to the Args box, as shown in the picture on next page.Important Note: The Ambient, Diffuse, Specular and Emissive are already set up properly, you don’t need to change them. There is nothing to change or set up on Shader Tab, so let’s move directly to the Textures Tab on Pass 1. Check the Stage 0 Texturing and select the remaining texture included in the pack:water_texture.tga – Once you select the texture, check the Display button and then, to finish, click once again on Assign Material to Selection button, wich will Finished Product: Tutorial Written by André. Realistic Water technique developed and improved by Bumpaneer and StoneRook. If you wish to know how to make more realistic effects for Renegade, start using WDump provided with the Renegade Mod Tools, there you can view all W3D’s Textures settings, making you be able to duplicate any effect Westwood added to their maps with textures. == Enjoy Your New Realistic Water ==