Search the Community
Showing results for tags 'renx'.
-
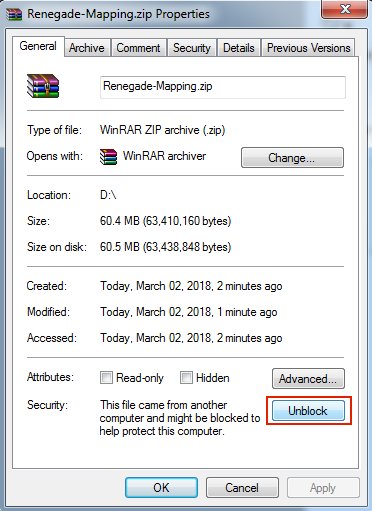
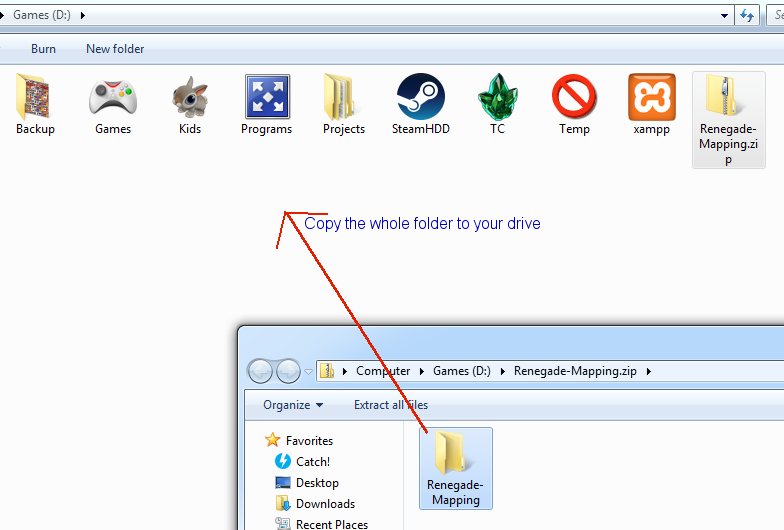
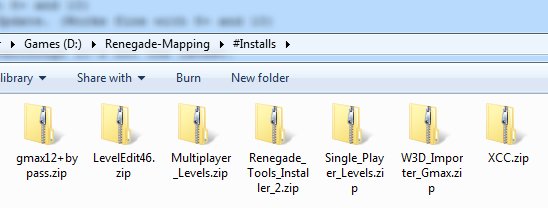
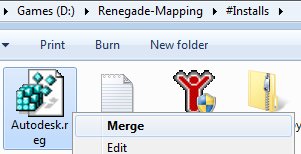
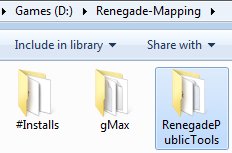
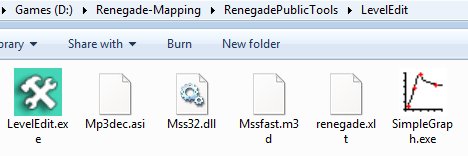
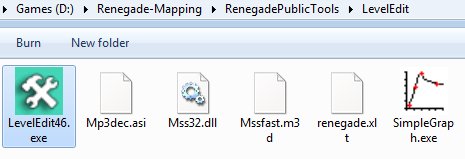
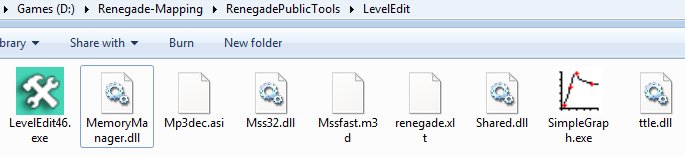
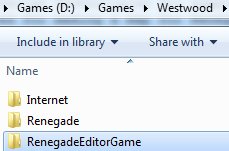
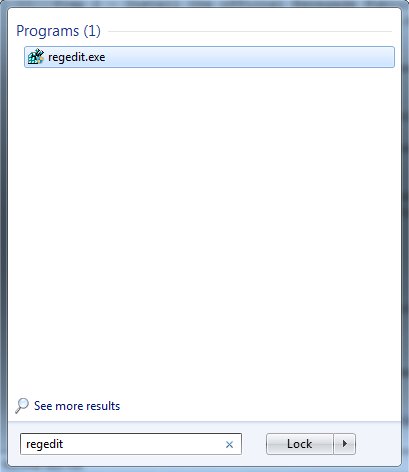
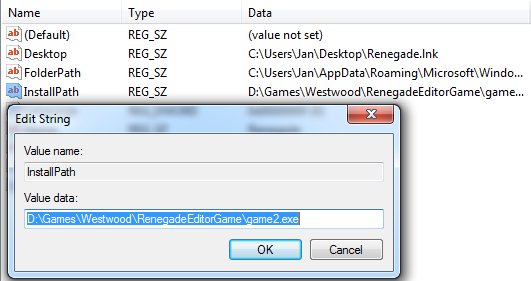
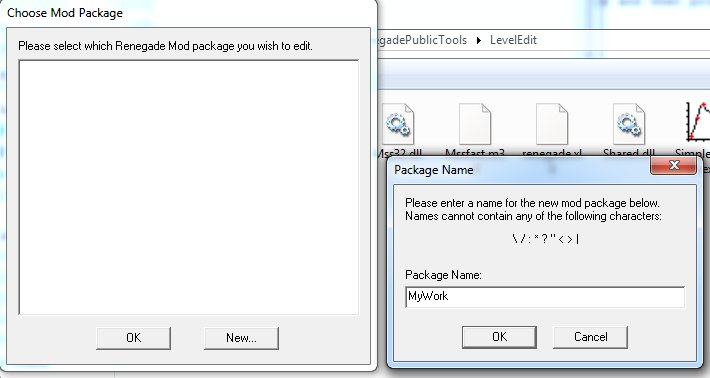
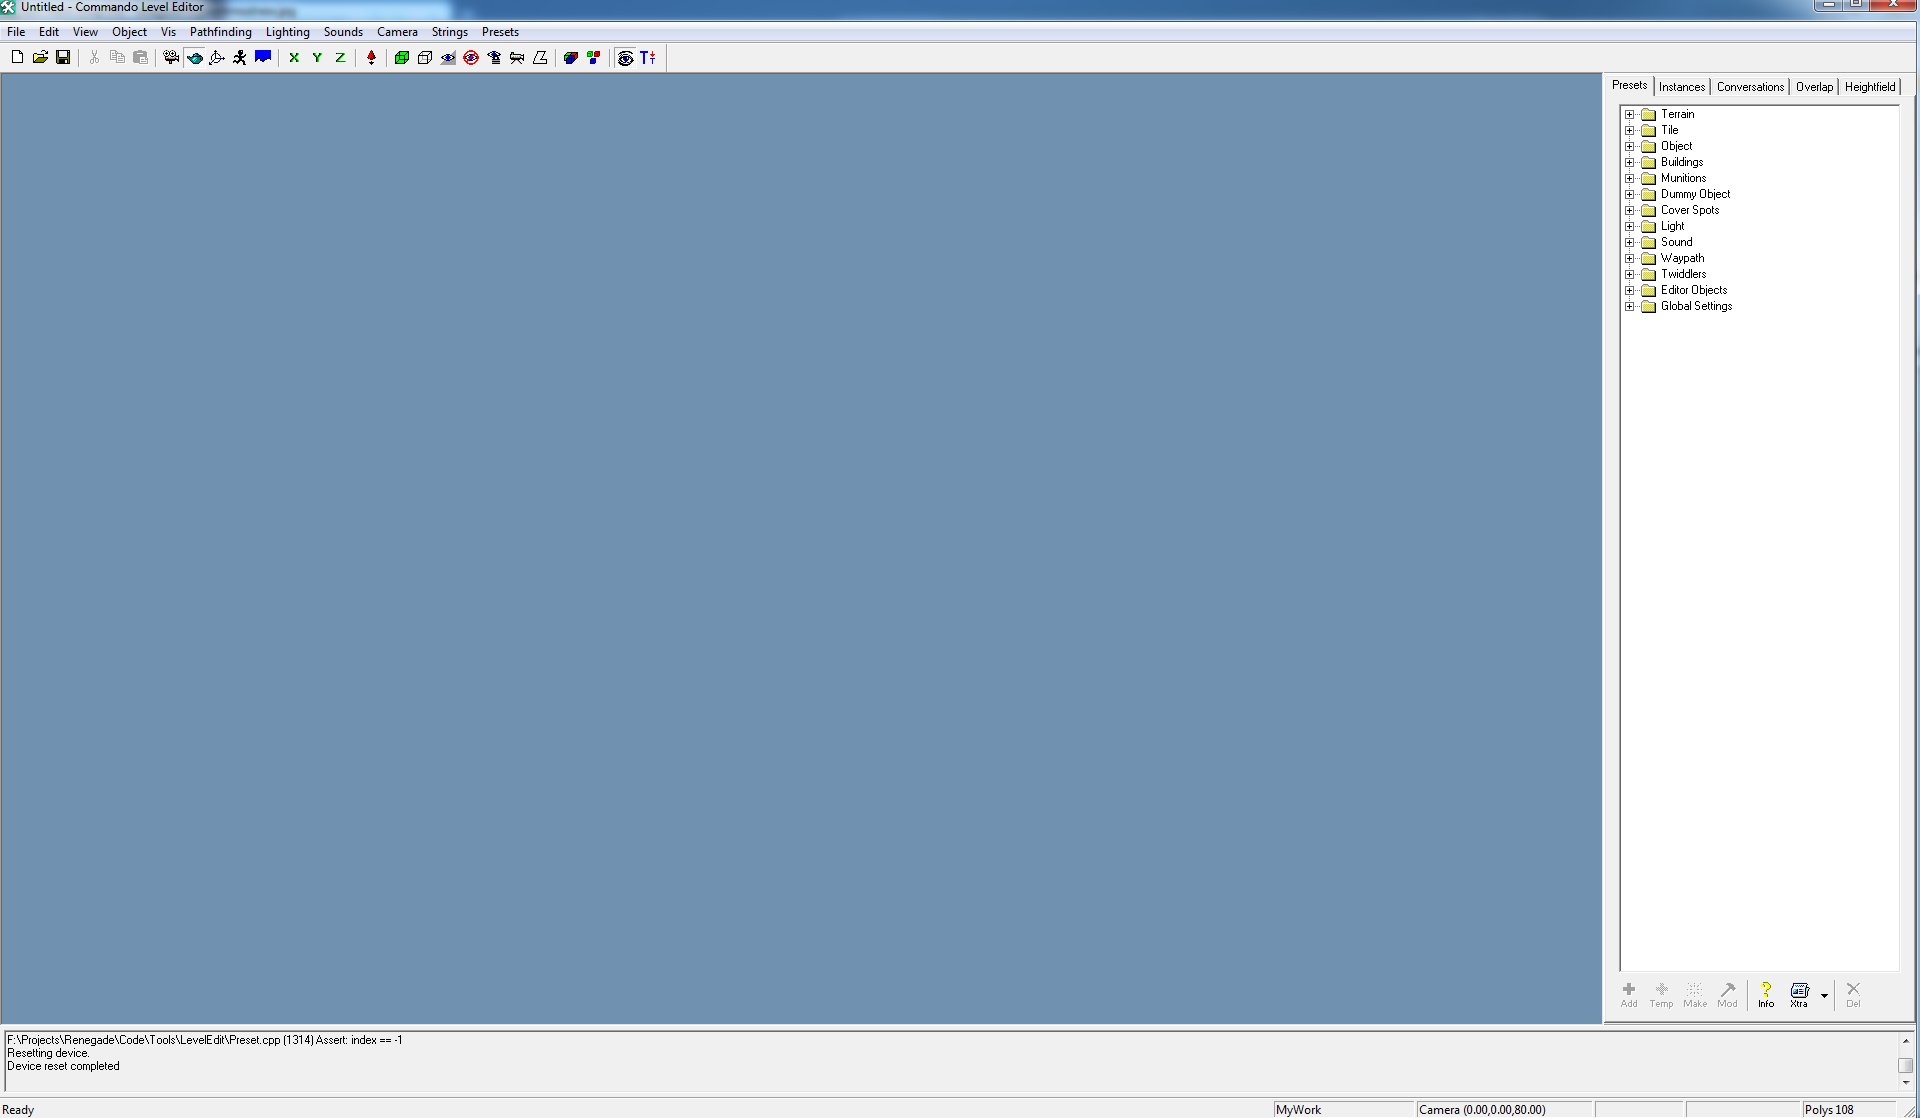
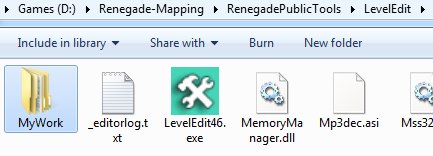
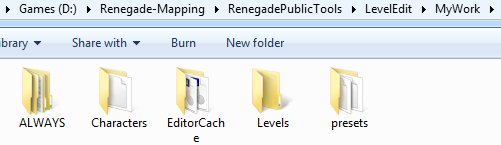
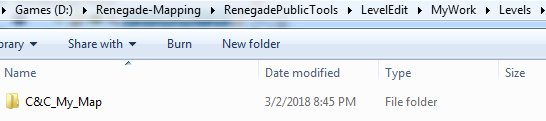
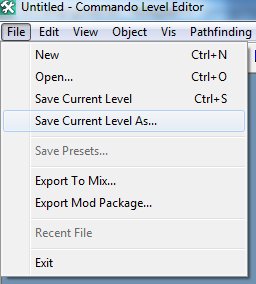
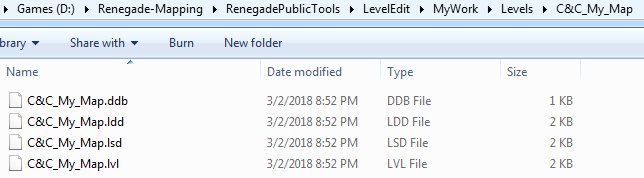
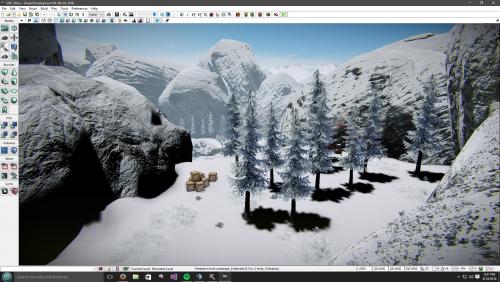
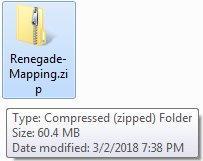
 The Environment Setup Tutorial This tutorial will attempt to learn you how to setup your entire working environment for creating maps in gMax and the free provided Renegade Public Tools v2. It includes all the tools you need and they should be installed in this particular order: 1- The gMax Installation Files and Registration ByPass. (NOTE: Windows 8+ and 10 are NOT supported, you'll need Windows 7 or XP Pro to use gMax without glitches, there is NO fix for this.) 2- The official Renegade Public Tools version 2 from Westwood Studios. (Works fine with 8+ and 10) 3- The unofficial LevelEditor from Tiberian Technologies for support with 4.6 Scripts Update. (Works fine with 8+ and 10) 4- Some (semi) Critical Assets required for making a map for Renegade in gMax/RenX. 5- The XCC mixer i personally have been using since i don't know when, it's the best eventhough it's not the latest. Environment Guide Package Download the file i prepared as zip from the MPF download area: Once it is downloaded, make sure you unblock the file by going to the zip properties and clicking "Unblock" BEFORE you extract it. In this tutorial i will install EVERYTHING to do with mapping for Renegade in my folder on the D drive in "Renegade-Mapping". Go ahead and extract the zip somewhere, open it in a new window: And then copy the contents somewhere: Go into the #Installs folder that you extracted inside the Renegade-Mapping folder Step 1 - Install gMax and apply the registry fix We need to install gMax first, you MUST install it first or it won't work properly later. Open the gmax12+bypass.zip and copy files into your #Installs folder and then run gmax12.exe to install it. In this guide i am installing directly into the Renegade-Mapping folder so the endresult will be something like the following: Now, because the author of gMax doesn't send out emails anymore to register gMax for free, there is included a Autodesk.reg file, right click on that and choose Merge and when promted do Yes to merge it. When installation is done and you merged the registry thing, then run gMax for the first time. You will be prompted to select a rendering device, here you choose "Direct 3D" and continue. Once it has fully loaded you must exit gMax again. Step 2 - Install the official Renegade Public Tools v2 Extract the file Renegade_Tools_Installer_2.zip and run the executable, install it into your Renegade-Mapping folder, endresult should look simular to this: Go into the folder LevelEdit and you will see these files: Now delete (yes delete permanently) the LevelEdit.exe that is currently there, the original from Westwood. Extract the file LevelEdit46.zip and copy the resulting LevelEdit46.exe to your LevelEdit folder like so: Goto your Renegade GAME folder, which you updated to the latest TT Script Update (available on http://www.tiberiantechnologies.org ) Copy the following files to your LevelEdit folder and overwrite any existing ones there: "MemoryManager.dll" "Mss32.dll" "Shared.dll" "ttle.dll" You should end up with a LevelEdit folder looking like this: Now make a complete copy of your Renegade game folder (which is updated to 4.6 of course) and name it "RenegadeEditorGame", just copy and paste it somewhere like: Now open the Registry Editor through your startmenu "search" option type: regedit and open it. Expand the folders (or keys as they are called) until you are inside the Renegade folder/key. "HKEY_LOCAL_MACHINE -> SOFTWARE -> Wow6432Node -> Westwood -> Renegade" You see the InstallPath option there? Double click on it and change its value to where your game2.exe is located in the RenegadeEditorGame you copied earlier, in my example here it would be: D:\Games\Westwood\RenegadeEditorGame\game2.exe Now close the Registry Editor program, we don't need it no more now, you don't need to save anything, it does so automatically. Run the Editor Ok, so we can finally run the editor now, go into the LevelEdit folder and run LevelEdit46.exe There click the "New..." button and call it for example "MyWork". Double click the MyWork in the window and it shall bring up the editor in action: You'll notice the editor created a folder called "MyWork": Which contains a few key folders the editor uses: Create a map project folder inside the levels folder like so: Inside this folder you will save your Editor's "C&C_My_Map.lvl" file and stuff related to your map such as W3D models/terrain and maybe textures, cinematic text files and/or audio. ALWAYS choose to "Save Current Level As..." inside the editor ALWAYS WHENEVER you want to save your progress, do NOT EVER use "Save Current Level" (trust me), period, or it will not update some files (lsd/ldd/ddb) for your map and it wont work properly when you make a .mix with XCC later on. For example the endresult could look like this: << i will update this guide later tonight or tomorrow, just 1 thing: If you have missing textures make sure you place them in your Editor_Cache folder and reload the editor >>
-
Version 1.4.6
166 downloads
This file contains all the assets i use in my guide to set up a working environment for Renegade mapping/modding with gMax/RenX and Level Editor. View the guide @ -
-

Version 5g
87 downloads
Renegade-X Client -
-
-
Optimizations: - Weapon Texture resolutions have been reduced to a max of 1024x1024. - Unnecessary textures due to shader optimization such as Gloss maps and reflection maps have been removed. - 3rd person weapon meshes now only have a single material slot for a single draw call. - All mesh LODs for 3rd person weapons have been updated. - First person arms mesh now uses a combined single texture map / material for less draw calls. At the same time this also fixes the stealth effect on the arms not working right due to more than one material. - Optimized all characters (draw calls, textures & shaders). - Gold Rush & Mesa II: - optimized collision, reduced lightmap sizes, optimized certain LODs, smaller filesize. - Optimized silo light map sizes. - Added a PT scene specific C-130 which is cropped and has much smaller light map size, - PT actors moved server side, and replicated to clients - Opening/Closing PT is now completely client-side Fixes: - No longer uses seamless loading. Could *possibly* fix crashing at game end. - Fixed a few shader issues with hovercraft, gunboat, and C-130. - Fixed issue with version check not evaluating the version number correctly. - Fixed shotgun and ramjet reticles always showing as yellow. - Fixed the air vehicles being purchased in non-air maps using the key press. - Fixed being able to heal over Max Armour. - Fixed a bug where if a player tried to enter another player's locked vehicle directly after it was produced, it would stop driving and not clear the spawn location. - HUD now actually calls the clean-up functions and also made it clean some extra references. Possible crash reduction. - Fixed the PT UI memory crash. - Restore enemy minimap blip visibily when targeting. - 1st person reloading animation no longer gets overridden by sprinting animation. - 1st person sprinting animation should now automatically play after switching to a different weapon whilst sprinting. - Fixed clients not seeing and hearing Airstrike aircraft if the Airstrike target area was out of sight. - Fixed being able to continue to repair 100% Friendly Tech Buildings. - Fixed Apache rockets being fired from the gun socket when playing as a client on a dedicated server. - Fixed Missile Launcher first person clipping through camera in some resolutions - Main Menu map will no longer show aspect ratio bars - Fixed lighting on the mammoth tank in the main menu - Fixed an issue that would cause spy crates to not set the spy flag if it changed your pawn (ie, going from non-SBH character to SBH and vice versa). - Fixed not being able to heal armour if the heal had 0 armour. - Fixed potential occurrence of being able to heal someone who is dead if they still had some armour when they died. - Fixed issue with beacons destroying buildings that they are very far by using the bounding - Fixed issue where player’s weapon ammo count did not update after leaving vehicles - Fixed infinite reserve ammo infantry weapons not showing as infinite in multiplayer. - Fixed respective ammo counters not updating when switching to a weapon with 0 usable or reserve ammo - Fixed SBH not lighting up properly when getting shot while cloaked - Fixed Stealth tank not lighting up properly when getting shot while cloaked - Fixed Stank often being and staying visible from any distance after getting shot Tweaks: - Added 60 second per-client cooldown for calling votes, so grievers can't prevent others from calling votes. - Vehicle explosions no longer do damage. - Added TeamDonate command. - Entering 0 into a Donate command now donates all credits. - Slight change to the client list output to make it easier for people parsing. - Restored playing Building Repaired sound. Building repair sound will not play if the building hadn't fallen below 85% health. Building repair sound replay cooldown is set to static 10 seconds versus 6-10 range. - Remove one thread frame lag, hardware physics, and speedtree in the settings, as they are not usable and performance hogging. - Hud Game Time now shows Elapsed Time if in a no-time limit match. - Added disallowed nicknames to Rx_Game. Very short names, or names containing certain reserved values are not allow (e.g. "-----"). - Added 0.5 second delay to re-access purchase terminal to disallow refill spam. Updated hud indicators to show non-accessible PT while the delay in in progress to avoid confusion. - Updated sniper, ramjet and shotgun reticles. - Going to first person in vehicles now zooms in for precise long shots. - Camera shows map overview at end of match, instead of "winning" player. - Scoreboard is now delayed about 10 seconds after the game is over. - Player main HUD will now be removed before the scoreboard is shown after the game is over. - Removed legacy building damage system which operated within the levels - Added new building damage system which is handled entirely within the actor classes - Updated base weapon shader to include a global simplified cubemap reflection, and also improved specularity by interpolating sharpness based on Fresnel to make highlights appear sharper with harsher facing angles which improves first person specularity considerably. - Updated various weapon first person positioning - Rocket Launcher, Missile Launcher, Grenade Launcher, Flak Cannon, and Heavy pistol now have proper explosion lights - Ramjet Rifle has updated impact effects - Current weapon will no longer perform weapon switching on the same weapon while reloading. this is to prevent a glitch on the arm mesh being visible. - Ramjet and sniper now have dots on their reticle - Artillery now has an ordinary tank crossair because of the reduced arch - Updated explosion particle effects - Barracks now has an improved interior, and now goes red at destruction state, it also has proper damage material changes like the other buildings - Carbine and Tactical rifle now have a subtle more aim-able firing animation when aiming down sights - renamed reduced gore to enabled gore to avoid major confusion. - Carbine and Tiberium Auto Rifle will now be unequipped on the back of the character rather than the where the pistol is holstered. - Enabled post process in the system settings for very low preset settings - Removed the HTML filter from EVA messages as they don’t seem to get fully parsed as HTML - Spotting an SBH will now give a "Spotted SBH near X !!!" message instead of just the usual "Spotted 1 infantry near X" - Previously you could never use spotting on an SBH when it was cloaked. Now you can do a spot message for a short time after it got hit even when its cloaked - Enemy Beacons as well as friendly Beacons can now be targeted with 'Q' to display a message about their location for your teammates - Upgraded the new DeployedActor building hit detection to more accurately support the varied shapes of buildings. - Added vehicle blocker volumes at the doors of the WF to prevent vehicles from being able to drive inside it on all maps - Orca's engine sound volume reduced to match that of Apache's New: - Replaced old java launcher with a brand-new WPF launcher. Pretty UI, update checks, community banners and more! - Added new shotgun first person animations. - Added new Marksman Rifle first person animations. - Added new Tiberium Flechette Rifle model, animations, and sounds. - Missile Launcher has new sound effects. - Missile launcher has new first person animations. - Silos now broadcast team EVA/Cabal sounds on Capture and Loss. - Settings options menu can be accessed through the pause menu. - Scoreboard system in pause nenu. - Chat system in pause menu. - GDI bought some less blurry siding for their barracks. - Donate menu in pause menu. - Added new end game camera fly through & music sequences - End game scoreboard vote menu UI now displays timer and next map - Added new Black Hand Sniper / Laser Chain Gunner character model - Added Option "Use Classic Ren Team Color Names" in the Input settings for both Frontend and Pause Menu. - Renegade player info (namely Score and Credits) are now saved between reconnects. - Added EVAPrivateSay, a server command that allows the server to privately message a player as "EVA". Comes in a lighter, more cyany blue. - Added Anti-Tank mines in the weapon section (non-refillable) - Added EMP Grenades in the weapon section (non-refillable) Balance: Autorifle: - Rate of Fire reduced to match classic renegade. - Damage vs armoured vehicles increased. - Projectile speed and range increased. - Headshot damage increased. - Spread increase, max spread, and base spread reduced. Shotgun: - Shotguns can now do headshots. - Shotgun headshot damage multiplier reduced to 1.5. Missile Launcher: - Alt fire no longer tracks targets. - Missile launcher building damage tweaked to be almost equal to gunner's rocket launcher in terms of damage per second against buildings. - Alt fire projectile speed increased. Tiberium Flechette: - Reduced based spread and spread increase per shot. - Range increased. Flak Cannon: - Reduced damage of both primary and alt fire - Reduced projectile speed - Reduced splash damage of alt fire Flame Thrower: - Added new volumetric projectiles that will damage targets within the volume instead of a traditional projectile - reduced range - reduced damage vs infantry to compensate for volumetric projectile Chemical Thrower: - Added new volumetric projectiles that will damage targets within the volume instead of a traditional projectile - reduced range - reduced damage vs infantry to compensate for volumetric projectile - removed gravity influence - Updated projectile effect Chaingun: - Rev up time reduced with quicker rate of fire. - Rev down time increased slightly. - Projectile speed reduced. - Maximum range increased. - Now fires armour piercing rounds which can damage heavy armour and has small radial damage on infantry. - Increased horizontal recoil. - Spread increase, and max spread reduced. - Removed ADS. Laser Chaingun: - Spread increase, max spread, and base spread reduced. - Rev up state fires shots in the same time. - Max range increased. - Horizontal recoil increased. - Head shot damage increased. - Removed ADS. Laser Rifle: - Spread increase, max spread, and base spread reduced. - Max range increased. Grenade Launcher: - Damage radius reduced slightly. Heavy Pistol: - Head shot damage increased. - Maximum rate of fire increased. Silenced Pistol: - Spread increase and max spread reduced. Volt auto rifle: - Spread increase, max spread, and base spread reduced for both primary and alt fire. - Increase maximum range. Airstrike: - Deploy time reduced slightly. - Blast radius on increased slightly - Damage increased slightly APCs: - Now fire armour piercing rounds similar to the chaingun. - Projectile speed reduced. - Projectile range increased. - Rate of fire increased. - Spread increased. - Reload time increased. MRLS: - Range increased to match Artillery's range. Humvee/Buggy: - Now fire armour piercing rounds similar to the chaingun. - Headshot damage increased. Apache: - Doubled missile count - Reduced missile damage slightly - Increased missile reload time to compensate for increased pay load - Increased gun ammo count - Reduced gun reload time - Increased vehicle health slightly Orca: - Now fire armour piercing rounds similar to the chaingun. - Head shot damage increased. - Bullet Rate of fire increased. - Bullet Damage reduced slightly to compensate for increased ammo and rate of fire. - Doubled missile count - Reduced missile damage slightly - Increased missile reload time to compensate for increased pay load - Increased gun ammo count - Reduced gun reload time - Increased vehicle health slightly Chinook: - Now fire armour piercing rounds similar to the chaingun. - Projectile range increased. - Headshot damage increased. Artillery: - Projectile speed reduced. - Artillery projectile gravity pull reduced to give less of an arch. - Artillery explosion blast radius increased. Medium Tank / Light Tank: - Recoil shake reduced. Light Tank / Medium Tank / Mammoth Tank - Range increased slightly. - Explosion blast radius increased slightly. Flame Tank: - Added new volumetric projectiles that will damage targets within the volume instead of a traditional projectile - Increased turret turn rate Mammoth Tank: - Increased vehicle speed - Increased vehicle turning rate - Increased missile range - Increased missile damage - Increased missile reload time Characters: - Reduced hitbox radius. - Stealth effect has more clarity but has the same distance reveal radius - Added a dynamic offset to the third person camera when aiming very high/low, so that the crosshair isn't obstructed by the player model (in like 96% of cases) - Updated character rag doll physics to be less limber and stiffer with less collapsing into itself Maps: Walls_flying: - Added vehicle blocking volumes to all 8 wall infantry ramps (stop vehicles getting on top of the walls) - Added extra blocking volumes to boarders (stop players climbing the rocks) - Added vehicle blocking volume to the middle of the hill (stop aircraft from getting stuck on the walkways) Whiteout: - Fixed some spots were vehicles could get in to the infantry only paths Field: - Updated minimap on field so that the silo is not a barn Islands: - Fixed collision bug on GDI tunnels. Goldrush: - Removed floating Tiberium crystal Volcano: - Bran new remake of Volcano Xmountain: - Remake of the UT3 RenX fan map by Kenz3001 remade by Kenz3001 himself!
-
Hey guys! It's been a long time since we've had an update, but there's a lot of exciting news that we'd like to share with you today. Beta 3 is coming out on October 8th! The long-awaited evolution of Renegade X is coming out in 8 days! After several months of working, testing, and of course, playing our previous beta on the side, we're finally ready to push a new beta build. After beta 3, we will continue working on Renegade X - we've got a lot of exciting stuff coming up for later updates. So, for Beta 3, you can expect to see the following: • Brand new Renegade X launcher! • New map: C&C Volcano • New items: AT mines and EMP grenades • New Black Hand character model • Crash fixes • New UI features (interactive pause-menu and scoreboard) • End-game sequences • Oodles of balance changes and fixes for weapons and vehicles • New first-person animations for some weapons • Audio changes (silo capturing is now broadcasted, weapon and vehicle sound changes) • Texture, LOD, and shader optimizations – game runs much smoother • TeamDonate command • Weapon and vehicle reticle changes • Many glitch fixes • And much more! Beta 3 will be available for FREE at http://www.renegade-x.com on October 8th 2014. What else is up? We at Totem Arts have been developing Renegade X for over 7 years. In that time, we released several RenX Unreal Tournament 3 alphas, a standalone singleplayer game, and two standalone multiplayer betas. We've come a long way - this game has matured, and so have we. As a free project, it’s difficult to give Renegade X all of the time and attention that it needs to hit its climax in success. Still, we plan to do everything in our power to support our community and empower those who can help us in that goal. For the next version of Renegade X (after Beta 3), we will be developing several new maps – including remakes of some of our favourite classics – and we will begin working on a new gamemode, which will be discussed at a later time. We realize that our players have dwindled significantly since our February release: we went from having 400-1000 players on at a time to just 40-80 players. You can still catch a good game of Renegade X at almost any part of the day, but we want to have a large, thriving, self-sufficient community. Perhaps the biggest cause of the population shrink is the crashing, which became too annoying for many people to bear. We believe we have fixed those problems. Another cause was ingame exploits, and we’ve since developed some countermeasures to the use of exploits. A third reason is that C&C mode – which is very different from what gamers are used to nowadays – perhaps did not appeal to some of the newcomers. While many FPS games are based on k/d ratios and capturing flags, Renegade X is about defending and destroying bases, which is radically different from the mainstream. Renegade X is not for everybody, but we are exploring ways to gain new audiences while retaining our roots. We are a free game, and therefore we do not have an advertising budget. Renegade X relies completely on word-of-mouth, so please do whatever you can to spread the news. Upload a beta mirror, e-mail a gaming site or magazine, record a YouTube video, post about us on reddit and other forums, and be sure to tell your friends! The bigger our playerbase is, the more work we can put into the game. With that said, we do aspire to become a Steam game, but we cannot do so without EA’s expressed permission. We have been trying to get to the EA licensing manager, but so far unsuccessfully. If you have any ideas on how Renegade X can become a Steam game, post them in the comments! If you know anyone from EA, point them in our direction please! Volcano The new and improved Volcano is complete, and it will be available in Beta 3. Check it out below! Black Hand Sniper! Check out the new Black Hand. Looks a lot better than a painted SBH, right? EMP grenades We’ve added a new purchasable item in Beta 3 that will be available to both GDI and Nod. The EMP grenade is a C4-replacement that freezes the vehicles in its radius for a few seconds. While the vehicles would still have access to their guns, they cannot move as long as the EMP effect remains. AT mines The new AT mine is an anti-armour C4-replacement. A player can deploy a maximum of two AT mines, which have the firepower of a remote-C4. However, these mines can be destroyed by enemy weapons. New Tiberium Flechette Model Capturing a Tiberium Silo gives your team the ability to purchase a Tiberium Flechette. We have created a new model - check it out! -- And that is all for today. Be sure to download Beta 3 on October 8th, and to stay tuned for more Renegade X news! Oh, and by the way, happy Rene-birthday X! September 30th was the day that we released our very first Renegade X alpha for Unreal Tournament 3 back in 2009. So we wish you fun times ahead and many presents to come Stay connected: http://www.renegade-x.com https://www.facebook.com/CNCRenX?ref=hl https://twitter.com/RenXGame http://www.youtube.com/user/NEfobbyGEN/videos
-
Making glass like the Nod Air Tower is simple... if you've already got renegade building textures, you won't need anything... here is what i got using the Nod airtower glass on your model select the glass dome and texture it with a w3d material, first tab to set up is the Vertex material tab.. change the opacity to 0.4and change the stage 0 mapping type to Environment move on the the shader tab and edit the blend mode set blend mode to alpha blend' set the material up you wish to use as a glass texture. check stage 0 texture up to desired materialI've used ref_reflect2.tga for my glass texturemake sure to click on display and apply the material to model glass before exporting you want to set the w3d options under w3d export settings goto geometry optionscheck valphacheck 2-sided if your model only has one mesh side and to repeat the material over to the none existing mesh side (underside of mesh)Export to desired w3d container (terrain, etc etc) This is the model i whipped up for this example as shown if you have followed my small tutorial goodluck Another thing is if you want the glass to shatter simply check the shatter option in the w3d geometry options also you want to add this code to the 'user defined' section of the mesh that is glass... to do this simply right click the glass mesh and click properties and you will see the user define tab in the text editor box place this code into it... " LVSMaterial1 = glass " without the brackets
-
-
http://www.ren-x.com/ Thanks to Kenz for the needed graphical updates and the logo stuff This will be our official MPF-Games Renegade-X website
-
http://www.ren-x.com Images by Kenzboi
-
Renegade-X will be released the 26th of February 2014! They have done it! Check out the video for general information and unique gameplay visuals.
-
RenX / Leveledit First of all, some things you should keep in mind about elevators: an elevator might cause problems if there are alot elevators, or if people try to use the same elevator at the same timewith a slow connection (56k for example) people might fall "through" your elevator and popup at the top after some secondselevators can NOT transport vehicles! You should always take care that the Transition Zones (explained in the tutorial later) are not reachable for vehicles because the wil get STUCK in them!elevators often cause problems with beacons, if you try to deplay them ON the eevatro plattformFisrt Step is ofcourse, create your elevator. This is myone. Ok its not very nice but thats a 2 min one Basicly an elevator has a platform (in this image the red parts), and a door (the blue parts). Of course an elevator can also have other parts in the deep of complexy you want but for this tutorial this is the best choice. Always create your elevator in the center of RenX/Gmax.To get an ide of the size of an elevator, the Single Player ones have an aprocxiamte size of L: 6m, W: 6m, H: 12m You can create a box with these settings to get an idea if your elevator has the right size: (my elevator is a bit too big as you can see, but the size is your choice, you just get a general idea about the size with this method) Because the Rengade-Engine don`t like textured objects that are moving we now create some "cages" that later will be invisible, but responsible for the collision parts. These are basicly just meshes without a texture that covers that elements, that later collide with players. Activate the W3D hide and collision Settings: Vehicle, Camera, Projektile, for the textured Meshes don`t activate any Collision Settings. Now it is time for the animation, an elevator has 3 Animation stages: Stage 1: (Baseframe) Move all your parts of the elevator so it is on the Top-Part, with the door open for enter at the Top: As you can see I just moved the whoe plattform up, and lowered the ring so if the player can enter the elevator at the top. Stage 2: (On the move) Now klick the animate Button, Goto Frame 1 and move your door so it is closed (you can use more than one frame if needed, just note this framae somewhere) Now on the trackbar goto frame 10, and move the elevator down, so it is on the botom with an closed door (same comment as before for the cloe door thing): The best is you note this frame on a paper or something, because you`ll need this later. Stage 3: (Final Animation) Now just make an animation when the door moves down, so you can leave the elevator. My one ends on frame 11, because only one frame is used for open the door in my example, of course you can use as many as you need: Now you`r finihed with this, deactivate the anim Button and feel good that the work is nearly done. Export the elevator to your Modpacket: Export it as HirachyAnimated Model and from Frame 0 to the last frame (in my example frame 11): Open the Commando (Leveleditor), browse to Tiles and press the Add Button Now enter a name, e.g. my_elevator, and switch to the Settings Tab Change the type to ElevatorPhys, Select your W3D and change Collision Mode to STOP, Animation Mode to Manual. Scroll a bit down and set DoorClosedTop to the frame when the door at the top is closed (that is frame 1 in my example), DoorOpeningBottom to the frame where the elevator is at the bottom with open door (Thats frame 11 in my case) ElevatorStartTop that is in nearly all cases frame 0 ElevatorStoppedBottom this is the frame where the elevator is at the bottom with closed door (Frame 10 in my case) Now cahnge the CloseDelay to the Time the elvator should need to go up/down and press OK and your nearly ready for test your elevator. Ok, now its time to tell the elevator where people will wait to enter: Select your elevator again and press Mod, goto the Zones Tab. You see 4 Zones: LowerCallZone: Defines the zone where the Character has to stay in to call the elevator to come to the bottom LowerInsideZone: When you are inside this zone the elvator starts to move Up UpperCallZone: Same as LowerCallZone but for the top UpperInsideZone: Same as LowerInsideZone but for the top When you doubleclick you can adjust the zones t the size / position you need. First / Lastframe switsche between the start and end frame so you easy can adjust the zones. Adjust now all zones like it is explained above. Here are mine: LowerCallZone LowerInsideZone UpperCallZone UpperInsideZone Now press OK and your done with the setup. Load your Level and select your elevatzro then press Add and it will apear on the map: Export your Map and test the elevator Congratulation! You can now go up and down with your elevator as long as you want.
-
renegade Renegade-X: Beta Access for all MPF Community Members!
zunnie posted a topic in Community News
(click image to visit website) REQUIREMENTS If you were registered BEFORE 24 October 2013 you are entitled to enter the Beta Testing Sessions for the game Renegade-X which is a Standalone rebuild of the Renegade game on the Unreal Development Kit running on the Unreal Engine 3 by Epic Games. This game is gonna be awesome of course, some of us have already participated in past Beta's and because of our good relations with the Renegade-X team they decided to give our members the opportunity to help Beta Test the game into its final state. INTERESTED? Please READ THIS TOPIC to enter the Beta Testing phase if you are interested. IRC Channel If you decide to enter the Beta Testing please take a moment to join the official Renegade-X IRC Channel on: irc.renegade-x.com or irc.multiplayerforums.com in channel #RenegadeX. Thanks! VOTE Also take a moment to vote in the poll over here. Thanks everyone for your continued support here at MPF and Renegade-X //MPF Staff & Renegade-X Dev Team-
- 2
-

-
- renegade-x
- renx
- (and 1 more)
-
-
-
I decided to have a topic for miscellaneous tips and hints that you might not know about in Level Edit, Renx/3ds Max, or some of the other editing programs. If you have a hint or tip to add to the list post it and I'll add it. Ren X Grid - Using the grid function helps you to line up your meshes without having to zoom in super far and manual align them. It can be turned on by left clicking on the Magnet with the 3 icon in the lower left part of RenX like so To change the distance that it snaps to simply right click on it and a menu will pop up, go to Home Grid then change the Grid spacing to your desired distance. You can tell if your grid is on if there is a large cyan cross over your cursor like in the below image Also when using the grid remember not to move an object by grabbing the X, Y, or Z arrows as those will move the object without the grid spacing on, move it by selecting the object itself. Level Edit Creating Good Lighting/ Fixing some texture glitches - So if you want your map to have good lighting in Level edit go to the Lighting tab then go down at the bottom and Compute Vertex Solve. This adds shadows to your map and fixes some minor texture glitches! Stamping Objects - I actually just stumbled upon this by accident but you can use a preset as a stamp tool. To do this create the object that you want. Once it appears move it to the position you want that preset. While holding down left click on the object right click and it will put that object in that position. You can do this as many times as you want. It is really useful if you want a bunch of presents around an area because you don't have to hit make everytime then move them to the position that you want. That is all that I have for now, if you know of any that would be good additions post them up, not every simple trick is general knowledge to everyone.
-
City/Square Tunnel Tutorial By Pwn Call (aka ESCALADE) ---------------------------------------------------- This tutorial is for making basic square or really basic shaped tunnels , just not including cave/rock type uneven tunnels although some of the same basic principals can be used for those type of tunnels as well. When you are done they could look something like this ------------------------ First I will do a small intro about the Snap to Grid tool, which in my opinion is the most useful function when making maps, that I just recently found out about. In the lower right corner of your RenX screen there is an area for Snap to Grid as well as a few other options, another really useful tool is the Snap Rotate tool which snaps to increments of 5 degrees by default. Look in the image below and the lower left icon with the magnet and the 3 is the Snap to Grid tool. It is default set to off so left click to turn it on. You will know your Grid is on when you see the cyan + sign displayed on the grid. To change the increments of the snap to grid or snap to rotation simply right click on them and a menu will pop up, go to the Home Grid tab and then change the grid spacing to your desired ammount, for this tutorial start the grid at .25. If your tunnel is significantly bigger, (for tanks for example) you can have the grid much larger like 1. Ok first you need to start off in Gmax with an area that your tunnel will be cutting through, could be a mountain or building but generally it should have a flat surface at the entrance and exit because it will make it easier to make. I recommend using the Grid throughout the whole thing as it makes it much easier. First this is my block I will put my tunnel through Now you need to create your tunnel. I have my view on the Left for this tunnel and simply make your box the size you want your tunnel, also note that you want some extra room on the sides and top because the dimensions of this box will be for the outside of your tunnel not the inside which you will see in a moment. Notice the blue line is the object I'm cutting through and the white is the new box that will be my tunnel. Also make sure that it is long enough to go all the way through your object so you can change the length or in my case since I made my tunnel from the side view the height. Next what you will do is create another box that will cut out your tunnel. This box needs to be smaller than your first box on the sides and top but make sure it goes down below the bottom like in this next picture. This will be cut away from your original box leaving your tunnel to walk through, here you can change the width of your tunnel sides and ceiling by making this box smaller or larger. Next change to the Top view again and make sure that the box goes all the way out past your original tunnel box so it cuts all the way through. If it isn't long enough change the length or height to make it long enough. It should look something like this. Here is the same thing in the perspective view Next what we will do is customize our user interface to add the boolean tool to the toolbar which is useful for tunnels and other objects. Go to customize then user interface Then go to the toolbars tab and scroll down to boolean compound object Once you find it click and drag it up onto your toolbar, it doesn't have to be where I put it just somewhere for easy access. Now we will select our original tunnel box mine is the outlined box in this picture Then we click on our new boolean tool icon This will open up the bar on the side for the boolean tool options. I will explain the other ones at the end of this tutorial but for now it should be set on Move and the choose Pick operand B So now while using the boolean tool after you hit pick operand B the next object you click on will be removed from the original object. So now click on the box that you want to remove from your tunnel and POOOF!! its gone and it took away from the other box and leaves you with a tunnel type object! If you accidentally pick on the wrong object no worry just hit undo and then select again. After you use the boolean tool on an object always turn it into an editable mesh afterwords, this way you can edit it or take another boolean out of it if you wish. Do this by right clicking on the object then Convert to Editable mesh Side note for boolean tool, NOT NECESSARY FOR TUNNEL TUT (So if you want to use boolean to make windows in a wall for example you would do your first boolean then convert to editable mesh, then select boolean again for the next window then turn into editable mesh, and keep repeating this process for all of your items that are taking away from the original object.) Now notice it did not cut away from the building that the tunnel is going through, this is because only the tunnel was selected when doing the boolean tool. Now we will cut through this box as well so we can go through our tunnel. So now change your grid spacing to half the size of what it previously was so in my case I will change it to .125 now. Now we will make a box that will cut out of the building, your settings might be messed up from using the boolean tool so go to the create tab and then standard primitives to make another box Make your next box in between the inside and outside of the tunnel and below the bottom. If it is inline with the inside edge of the tunnel then two textures will be in the same area and it will flash in between the two textures and look weird on your map. Again make sure it goes out past the length of the tunnel so it cuts through all the way so make it bigger like in the second image here Now select the building that your tunnel will go through, in my scene the blue square. Now go to the boolean tool And again move should be checked and the pick operand B Then click on the part to take out, again in my case the green square. And there your tunnel should work now! And don't forget to turn the building back into an editable mesh! Alright this is where the basic tunnel is finished, if you want your entire tunnel to be the same texture just add the texture you want to it and create a plane for the floor. If you want different textures for the walls and ceiling then do not add a texture to it and continue reading below. ----------------------------------------------------- Advanced Tunnel Textures. If you want the sides of the tunnel, the roof of the tunnel and the outside of the tunnel to be different textures then follow these steps! Before you start this make sure there are no textures applied to your tunnel at all first, otherwise it could mess things up and will be harder to add the textures to different parts of your tunnel. Your tunnel should be an editable mesh, if it isn't right click on it and turn it to an editable mesh. Then under the modify tab on the right click on editable mesh and then the polygon icon Next where it says Perspective in the upper left part of the Grid, right click on it and turn on edged faces if they weren't on. This helps you see which parts of the tunnel you have selected. Now that you can see better what you are selecting select both of the walls of the tunnel like in this picture, see how they are outlined in red now. Now right click on the selected area and go over to detach and click it. A smaller window will pop up if you want to name it something different than what is in the blank you can but it is not necessary. Neither box should be checked and hit ok to detach it. Now do the same thing for the ceiling, select it and then detach it. Now you should have 3 separate meshes for your tunnel, be careful because they can be moved separately now as well. Texture each of them differently to make your tunnels look more realistic like the ones I show below. A good idea once you texture them is to group them by selecting them all and then go to to group menu and then group. This way you can clone them and move them to other places if you wish. You can also change the shapes of your tunnels by converting them to editable mesh and then moving one end to make them go up or down. Play around with it a little bit and you can do some pretty neat things with the boolean tool. If you have any questions post them up and I'll do my best to answer them!
-
Destructible Pillars Tutorial By: Pwn Call (a.k.a. ESCALADE) This is a tutorial that will teach you how to make destroyable pillars in C&C Renegade. Think of the scene from the movie the Matrix where all of the pillars are exploding from gunfire (only a little less epic) Here is a quick video to show you what your final outcome could look like. ----------------------------------------------- Quick disclaimer before you start. Make sure when doing this you don't put too many of these in your level as it requires a lot of meshes depending on how you make your pillars. I wouldn't recommend making the breakable tiles as small as I did in the video that was just a quick test level. Also to allow for fewer meshes you could only make them breakable in the areas that are around the height of a player where you would normally only shoot anyways so you don't make too many extra meshes. ------------------------------------------------- If you already know how to set W3D settings for objects and are experienced in map making there is a quick outline of how to set up the pillars at the bottom. ------------------------------------------------- First step is to create the core of your pillar in RenX. Create a small vertical box about .5 X .5 (depending on how you want your pillar or object) and whatever height will fill your room. For the core I recommend the texture "ref_cemnt_tmp.tga" which is from the Renegade texture pack. Also when you create the core of your pillar make sure to name it something like "core" because you will want to know what everything is by name for setting W3D options which I will explain later, also it makes it much easier to duplicate your pillar and select all the necessary parts later on. Here is my pillar with the outer "destructible" pieces near the bottom Next you will create the "destructible" part of your pillar as seen in the above image is the brown tiles at the bottom. In that picture there are 8 tiles that surround the core pillar, you will need to make these go all the way to the roof so your pillar is completely covered. Do this by selecting them from the "Top" view and then go to the Edit Menu>Clone. To move them up I would switch to the side view and I would also change your snap to grid settings to the same height as your breakable tiles so you don't have to line them up manually. Again make sure that they have a common name like "shatter" or "Break", just something so you know what they are so you can select all of them later. As you can see in this picture make sure they are outside of the core of your pillar so the core doesn't show through and they completely cover it. Here is the side view to clone them up to the ceiling. Next what you will need to do is create a collision box that is completely outside of the entire pillar and outer breakable layers as seen in this picture. Again name it something like "collision" so you know what it is. It only needs to be the height of the player but you can make it all the way to the ceiling, this is necessary because it stops the player from breaking the outer breakable layer when walking into them. Now your pillar is complete and all you need to do is set up the collision settings. If you want to make more pillars simply clone this one and move it where you want it. Create however many pillars you want and then set the W3D settings after because when clones the W3D settings are reset. So first I will go into detail on how to set up the W3D settings for the Outer collision box. First to select all of your collision boxes go to Edit>Select By> Name. Now you will want to select all of the meshes that are called "collision" or whatever you named them, this is only for the outer collision box. Once you have them all selected go to the Utilities Tab then W3D options then scroll down to where it says W3D export settings. Under Geometry you will check the Hide box and under Collision settings only click Physical. You can leave all of the other options the same, this will hide this box but make it so you run into it with your character. Now for your Pillar Core's again go to Edit>Select By>Name and select all of your cores, this time under W3D options only check Camera, Physical, and Projectile under Collision settings and leave everything else the same. And finally for your destroyable tiles around the pillar go to Edit>Select By>Name and select all of the meshes that you named "shatter" or "Break" or whatever you named them. There will be very many of these meshes. For these W3D settings check off Shatter under Geometry and check off Physical, Projectile, and Camera for Collision settings. Now your Pillars are ready to go!! All you have to do to make more is select them all and hit clone and move the new pillars where you want them. Make sure when cloning you redo the W3D options because the clones don't have any W3D options set! Play around with these settings to see what other cool things you can create. ------------------------------------------------------------------------- Quick Overview for Experienced Map Makers. Create the pillar core with normal W3D settings, Physical, Projectile, Camera Create your destructible outer meshes completely covering the core, W3D settings > Shatter on Geometry, then Physical, Projectile, Camera Create a box just bigger than all of the meshes, W3D settings > Hide on Geometry, then Physical The last box stops the player from bumping into the outer layers and destroying them.
-
Version 1.0
117 downloads
Laeubi: All models are ready to use, you just need to add them to your map (on a flat surface). Since the last version I have optimised the texture sizes and material types in other words you get better FPS. and replaced 'n_ped.tga' with 'n_pedpmc.tga' texture zunnie: For a nice tutorial to use teleporters on your map please see this topic. -
Version 1.0
58 downloads
Laeubi: This model is based on an unfinished Westwood model of a gaurd tower that can be seen in the WW building pack, I made this from scratch, I have not used the unfinished model as a base. I have included my skin of the neutral cannon emplacement that gives it a light gold colour to resemble a GDI unit. -
-